Better Together: 6 Ways to Use Multiple iZotope Plug-ins in Your Next Session
iZotope plug-ins can be combined to create new sounds and streamline workflows. Here are six ways to use iZotope plug-ins to do just that.
One of the great conveniences of using digital audio plug-ins is how easy it becomes to mix and match your processing effects. That means we creators can quickly explore our hair-brained ideas, produce interesting sounds on the fly, and instantly enhance the character of one plug-in with the help of another.
In this article, I’ll show you six ways to combine iZotope plug-ins so they sound better together.
- Create a static mix with Neutron 3 and Visual Mixer
- Clean up and repair audio with RX and Nectar 3
- Produce quick vocal effects with Nectar 3 and VocalSynth 2 harmony modules
- Add presence and depth with Vocal Doubler and Exponential Audio Reverbs
- Diagnose mix balance issues with Tonal Balance Control 2 and Neutron
- Generate warm and woozy effects with Iris 2, Trash 2, and Vinyl (which you can download for free here)
Note: This article references discontinued iZotope products including Trash 2, Iris 2, Mobius Filter, and Nimbus, as well as a previous version of RX and Neutron. Learn about 

RX 10 Advanced


Neutron 5
1. Easily create a static mix with Neutron 3’s Mix Assistant and Visual Mixer


Neutron


Visual Mixer
Leveling your static mix
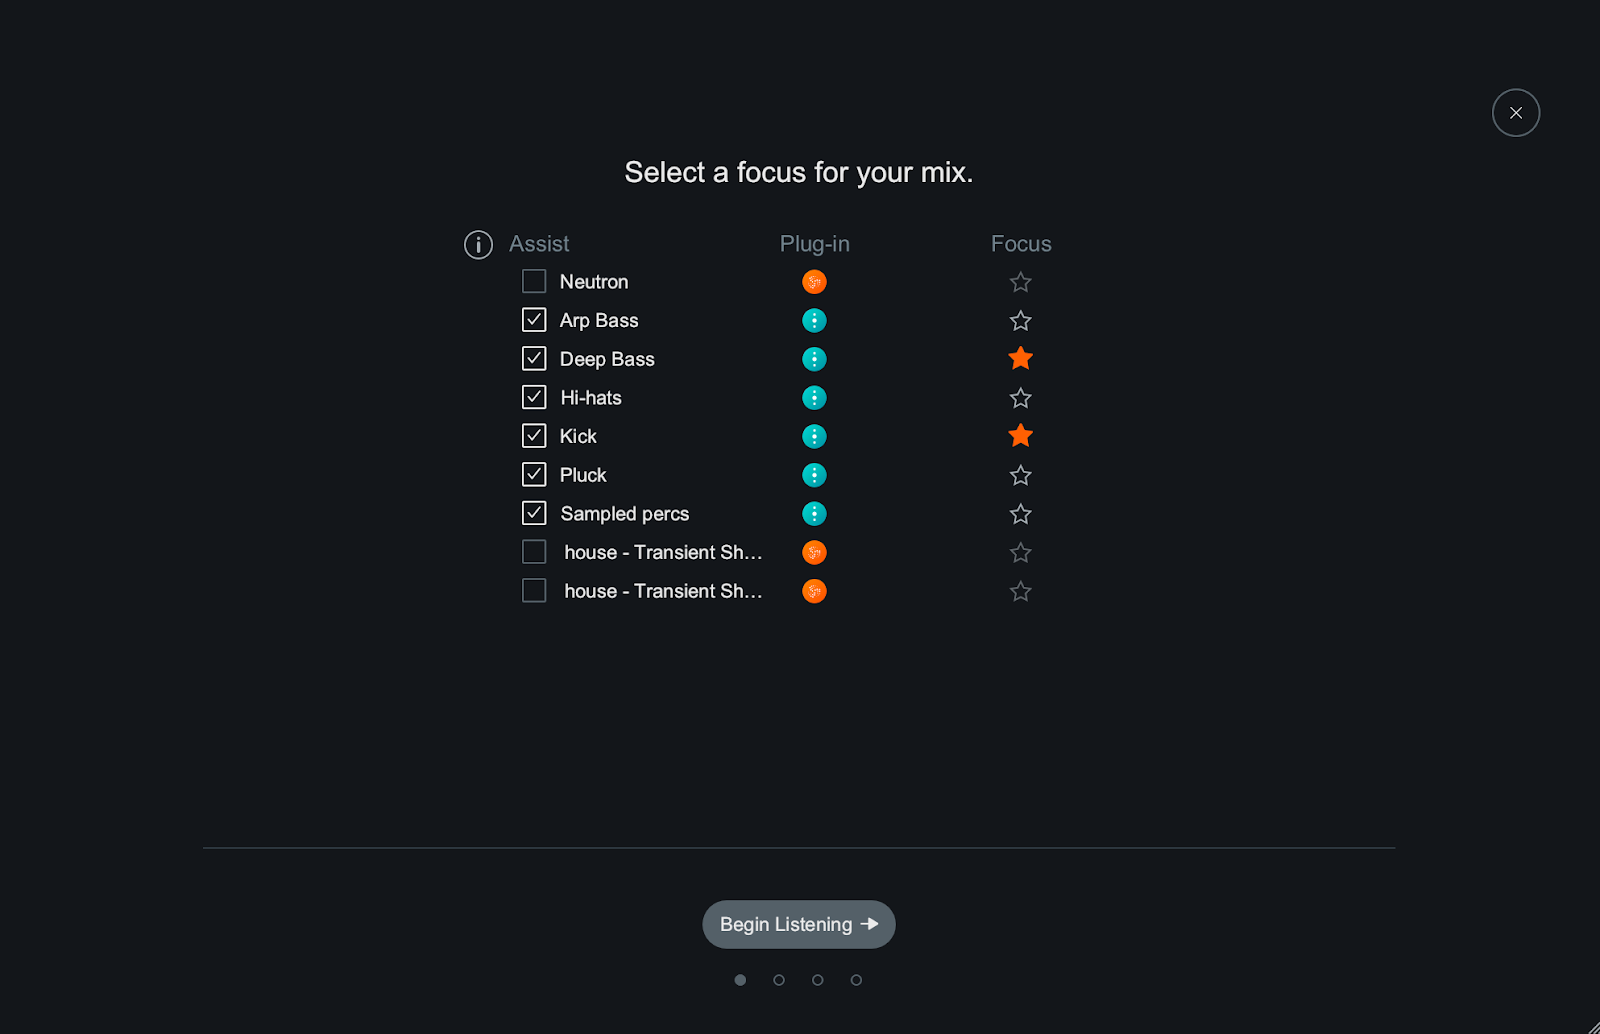
Mix Assistant takes care of the first part by listening to your tracks and automatically setting the appropriate levels to improve the balance of your mix. Follow Mix Assistant’s instructions to play your song from beginning to end, and it will adjust the levels of all tracks in your session that have Neutron 3 and


Relay

Mix Assistant in Neutron 3
Once Mix Assistant has done its job, you can adjust track levels based on broad instrument categories—easy!
Panning your static mix
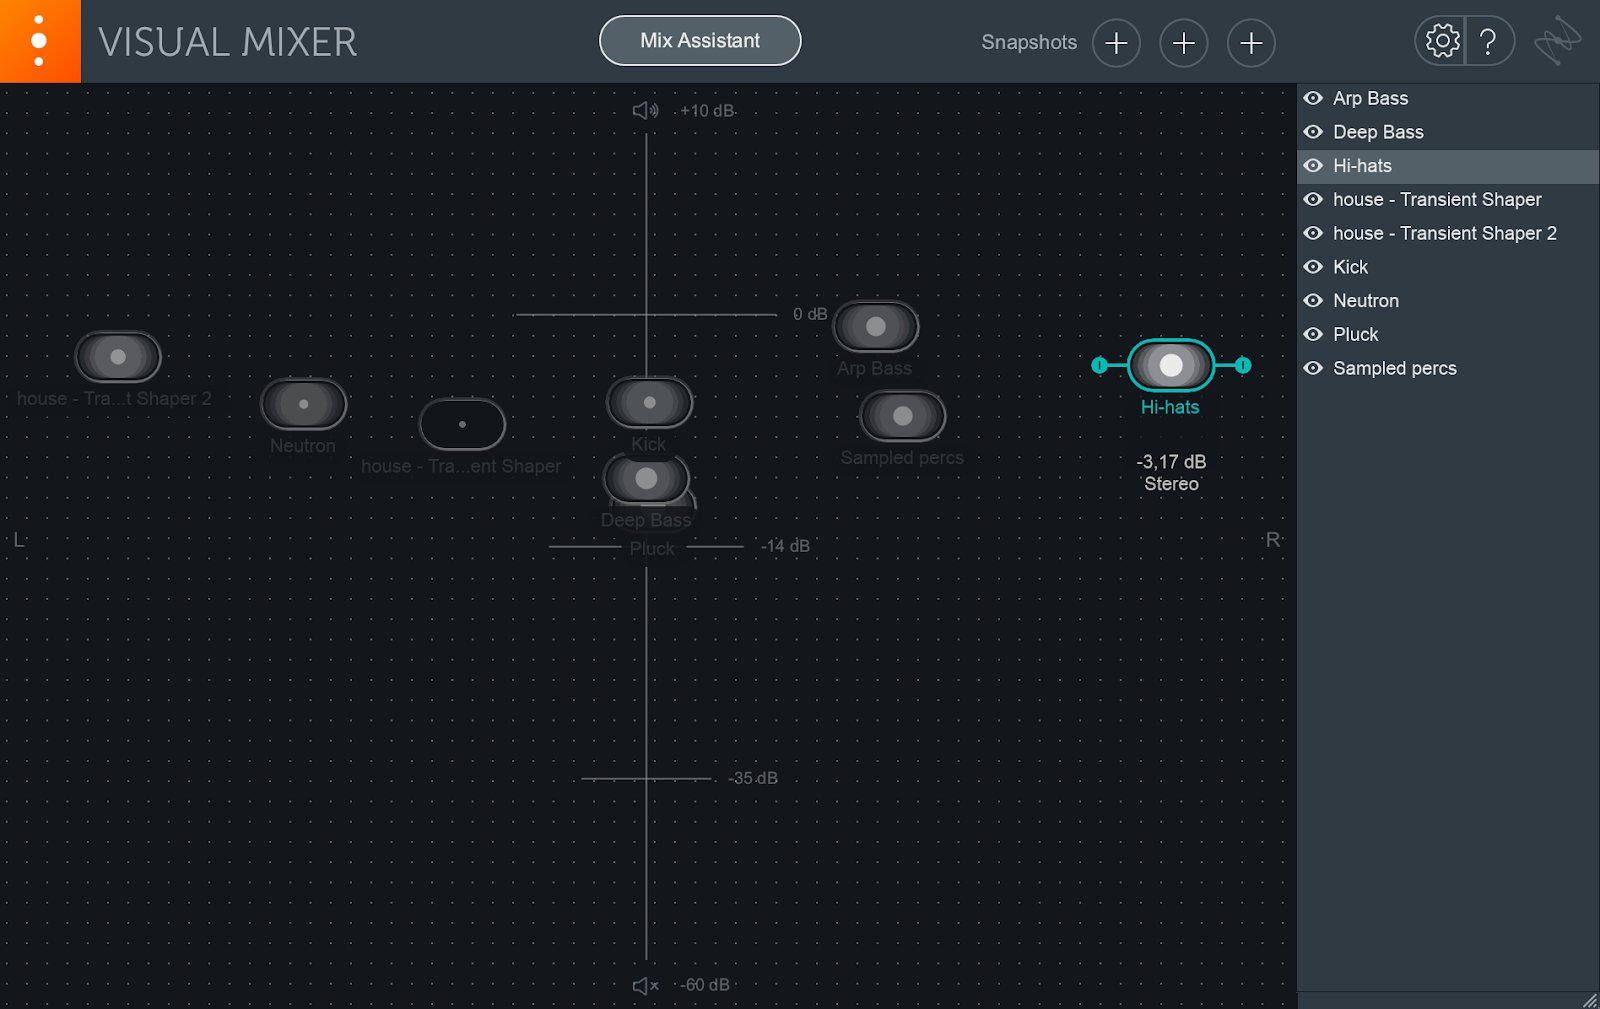
The second part of the static mix—pan positions—is where


Visual Mixer
By dragging nodes around the XY field, you can adjust that channel’s position in the stereo field, which you can then check using the free


Ozone Imager V2

Visual Mixer plug-in
With these two plug-ins, you’re able to make fast, intuitive decisions about where you want to take the static mix. I wager it beats the tedious process of going track-by-track in your DAW to nudge individual gain levels and pan dials.
2. Quick audio cleanup with RX and Nectar 3 Plus
Cleaning audio is an essential step in music creation because it sets the conditions for the tone of your processing with mixing tools like Neutron and


Nectar 3 Plus


RX 11 Advanced
RX gives you a cleaner mix, that’s for certain, but it also gives you more control over your sound. You may actually want a little crackle from that 60s acapella, but just the right amount to convey warmth and not overwhelm the mix with spiky transients. There are a number of ways to get to work with RX—you can use individual modules in your DAW, edit by hand within the RX standalone application, or trust the Repair Assistant to search for and remove noises based on machine learning algorithms. I typically use the standalone application to grab specific noises manually, and the Repair Assistant to get rid of issues that are consistent across a recording.
Remember, the cleanliness of your audio impacts how your processing sounds with mixing tools like Neutron and Nectar 3 Plus. If you leave unnecessary clicks in a drum loop, you may trigger Neutron 3’s compressor to compress at the wrong time. If there is too much noise and hum in your vocal, Nectar 3 Plus’s delays will smudge the contours of your mix. So be sure to use these plug-ins together to optimize your results.
3. Producing quick vocal effects with Nectar 3 Plus and VocalSynth 2 harmony modules


Nectar 3 Plus
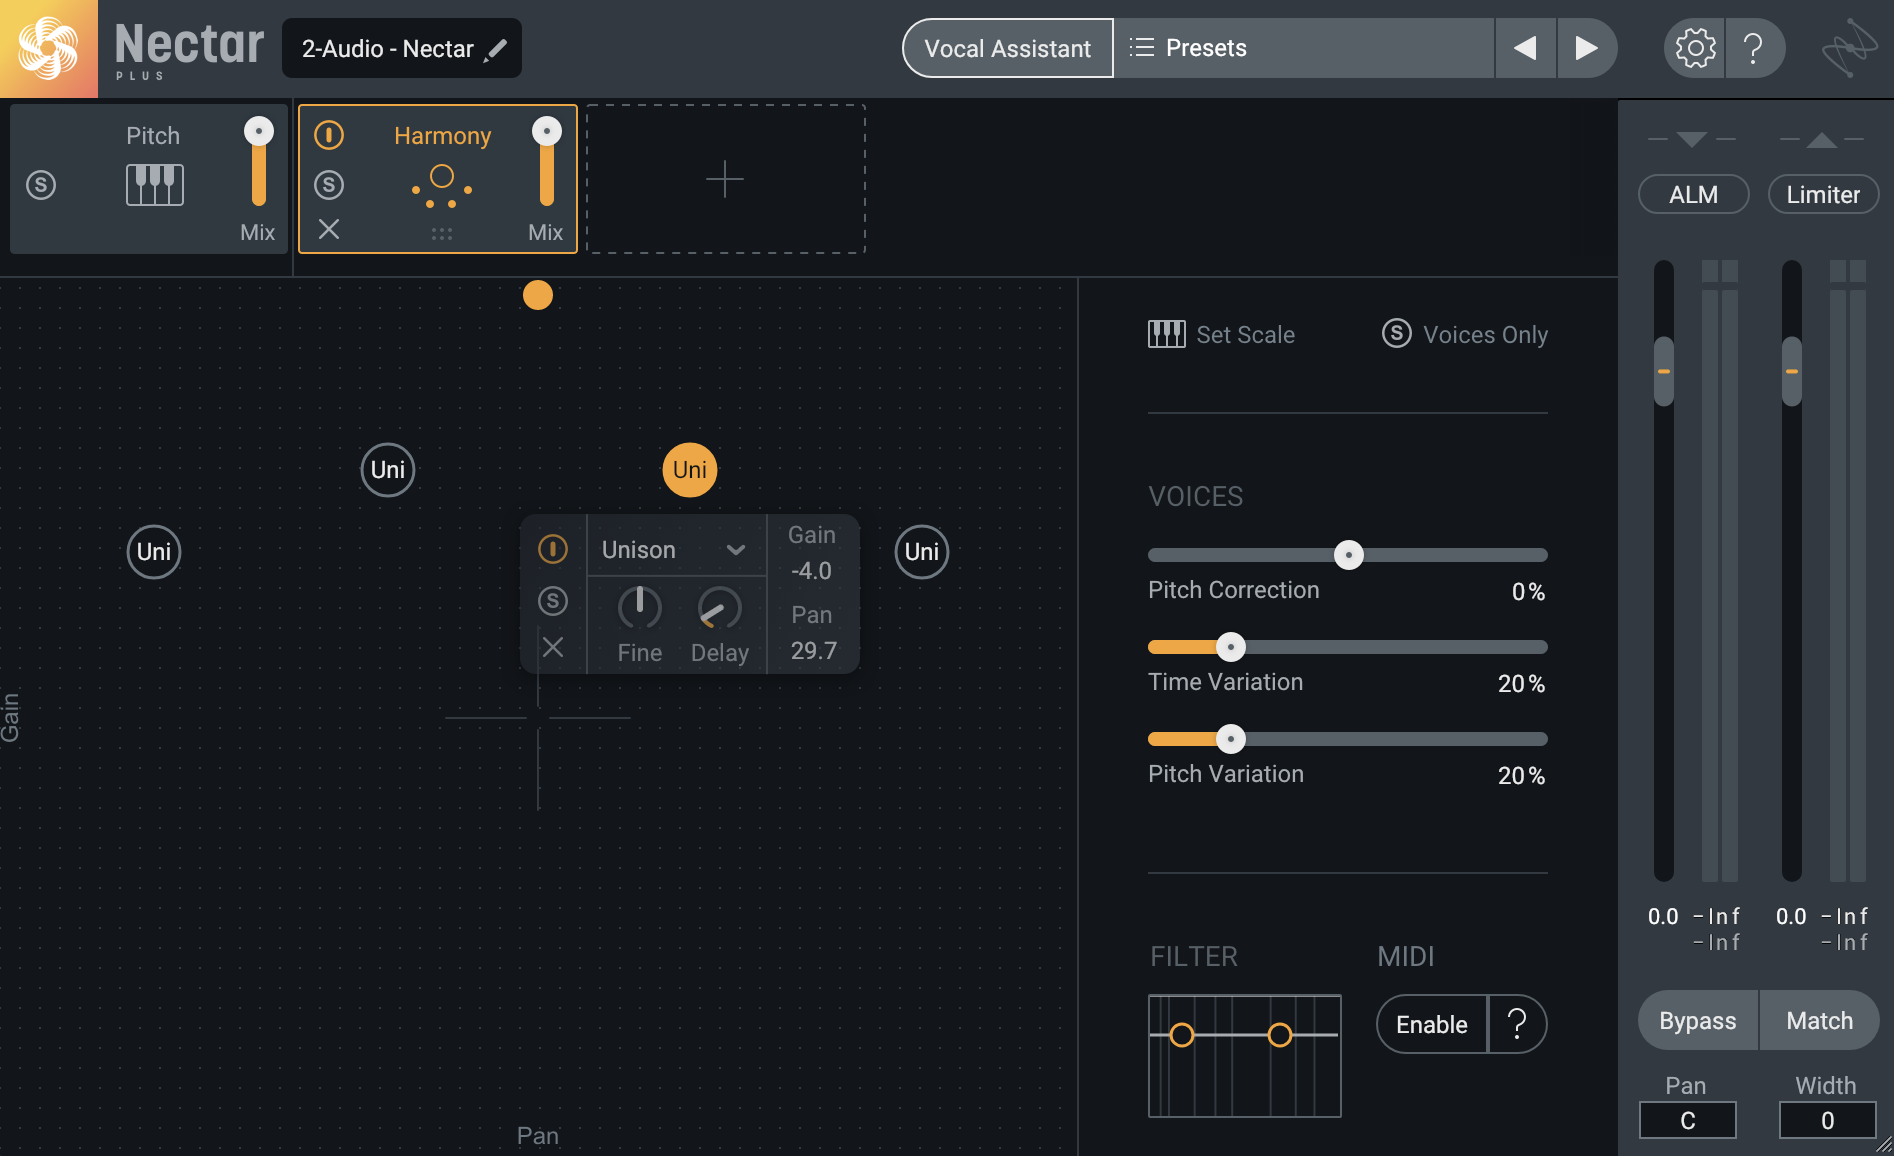
One of the great bonuses of the module is Voices Only mode, which outputs the harmony voices while muting the original sound. If you double your vocal track with Nectar 3 Plus and use one for copy for the lead and the other for background with Voices Only enabled, a gamut of creative processing options opens up.

The Harmony module in Nectar 3 Plus
One such option is to use


VocalSynth 2
Since the harmonized voices are on their own track, you can also take advantage of the additional FX modules in both Nectar 3 Plus and VocalSynth 2 to mess with them further. Biovox, Compuvox, and Polyvox in VocalSynth 2 are especially fun.
4. Add presence and depth with Vocal Doubler and Exponential Audio Reverbs
On the topic of vocals, here’s another quick tip.


Vocal Doubler
After finding the right settings, use an


Exponential Audio


Exponential Audio
Depending on the effect you want to achieve, reverb can either be placed directly on the vocal track or used as a send. As explained in our article Aux vs. Sends, it makes more sense to strap reverb on as an insert when further processing is required and then tweak the effect to taste with dry/wet controls. For a sense of cohesiveness—in other words, to get your vocal to sound like it belongs with the rest of your track—sends do a better job.
5. Diagnose mix balance issues with Tonal Balance Control 2 and Neutron 3, Nectar 3, or Ozone 9


Tonal Balance Control 2
When mixing in a non-ideal setup, you may add too much low-end, muddying the kick and bass. If you’ve been mixing for hours on end, you may add more highs to the vocal than necessary, then turn up the levels of other instruments to compete. These decisions throw off the balance of the mix.
Looking at your Tonal Balance Control 2 window, frequency balance issues can quickly be addressed by considering the location of the white lines within the blue-green overlays. In the mix shown here, my lows are overwhelming and my highs are underwhelming.
To zone in on the issue, hold alt or option (PC vs. Mac) and click the problematic area on the plug-in interface. This will solo the corresponding audio within the spectrum, so you can hear what may be contributing most to the imbalance.

Tonal Balance Control 2
To solve the issues, you can adjust the gain and EQ on problem tracks right from within Tonal Balance Control 2, by selecting any


Neutron


Nectar 3 Plus


Relay


Ozone 11 Advanced
Learn how to do all this in the video below:
6. Warm and woozy effects with Iris 2, Mobius Filter and Vinyl (Free!)
If you’re like me and have a soft spot for 80s-style shimmering guitars, pads, and keys, combine the following iZotope plug-ins to achieve this effect in seconds: Iris 2, Mobius Filter and


Vinyl
Pair this with Vinyl, the free lo-fi emulation plug-in that adds pitch bends, dust, and scratches to audio to get some warm and woozy sounds, perfect for your next R&B tune or modern Funk banger.
If you already have a copy of


Nectar 3 Plus
The takeaways
If you’re a new iZotope user or just haven’t had the time to explore how our plug-ins can be combined with one another to create new sounds and streamline workflows, I hope this article has given you a handful of entry points. While you sometimes only need one tool to get the job done, a helping hand can go a long way in many artistic settings.
