4 Uses for Vintage Modules in Ozone
Learn when and how to make use of Vintage Modules to master a song, and the new Vintage mode in Ozone 9’s Master Assistant.
With the arrival of Ozone 9, the powerful Vintage modules—previously only available in Advanced versions—are now part of Standard. Whether these modules are brand new to you, or you’ve had them in your back pocket for a while, but have been unsure about how and when to use them, this article is for you!
The first thing to mention is the inclusion of the brand-new Vintage mode in Master Assistant. If the Vintage processors are new to you, this will allow you to get up and running with these modules even faster. Master Assistant will suggest great starting points for the EQ, compressor and limiter, which you can then tweak to get just the sound you’re after. Do keep in mind that it won’t be presumptuous enough to add tape, though. That will always be left to your discretion. But I’m getting ahead of myself.
In this piece you’ll learn:
- Why you might want to use vintage modules in the first place
- When to apply each of the four vintage modules
- What types of results you can (and can’t) expect
Why vintage?
So why would we want to use these vintage modules anyhow? Well, in short: warmth, grit, vibe, color, and character.
Vintage modules in Ozone are based on a variety of classic, high-end, analog gear. While a lot of this gear was state-of-the-art when it was manufactured, the thing about analog gear is that it inherently has some imperfections. However, over decades of hearing these imperfections all over popular music, we’ve come to love and even desire them.
That’s where these modules come in. They allow you to dial in some of that classic, beautifully-imperfect warmth and character when you need it. Let’s take a look at them one by one and see what they have to offer.
Vintage EQ
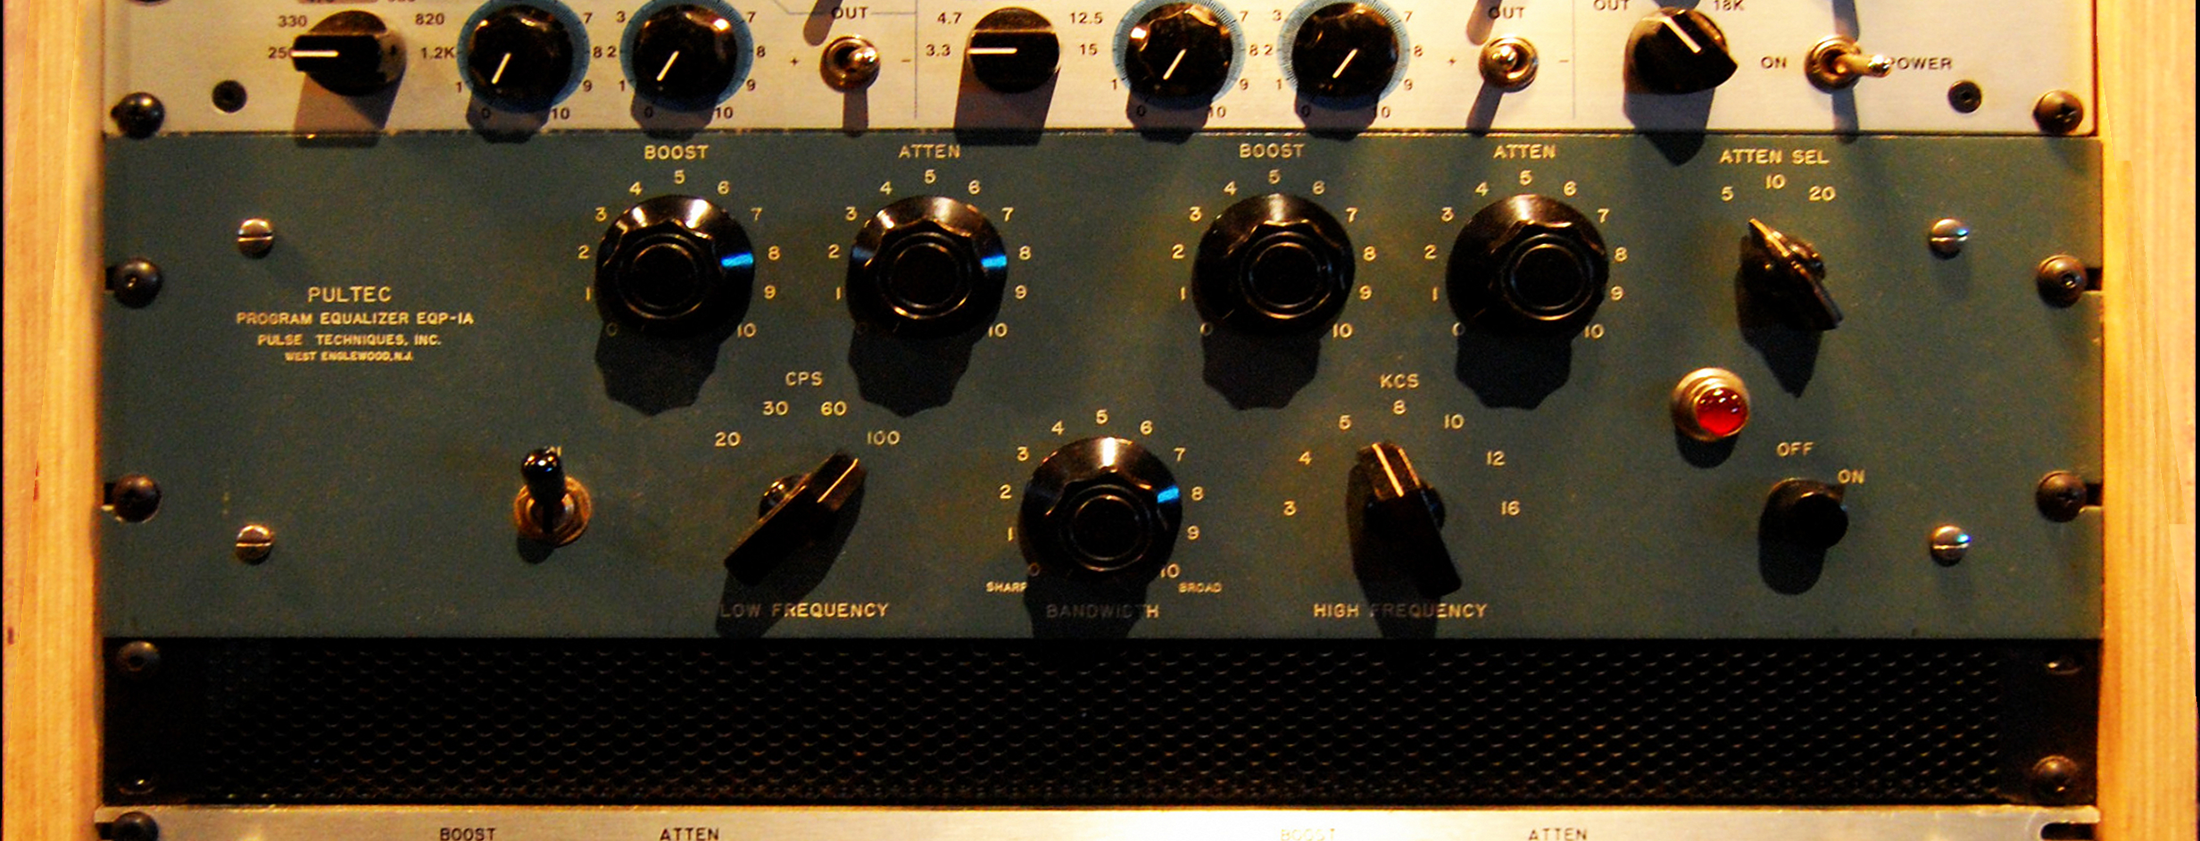
The Vintage EQ module is based on two legendary tube equalizers: the Pultec EQP-1A and MEQ-5. Unlike other emulations you may have seen, a different approach was taken to modeling this module. While it was modeled at a circuit component level to match the frequency response characteristics of the original, it is free of the noise and harmonic distortion present in the originals. The result is what we might call an “idealized” model.
So why would you want to use this rather than the main EQ modules, or an emulation of the Pultec that includes the distortions inherent in the original units? A few reasons:
Broad strokes:
The EQP-1A and MEQ-5 are great broad stroke EQs. When you need to make wide, sweeping changes to your basic low, low-mid, high-mid, and high frequency ranges, this is a great tool, even if the changes are subtle.
Faster, easier decisions:
The limited bands and frequency selections may be contrary to what we’re used to in today’s digital EQs, but by having to make fewer decisions, you can work faster and more intuitively.
Just the curves:
By removing the noise and distortions, but maintaining the classic Pultec EQ curves, you can maintain more control over your signal. If saturation and harmonic distortion is something you want, you can easily add it to taste with either the Exciter module, or one of the other vintage modules.

Pultec EQP-1A
Have a listen to the Vintage EQ in use on Sportsfan’s “Runner’s High.” It’s adding just that little bit of oompf and sparkle (both technical terms) that are helping the mix really shine.
First, here’s the mix flat with what I’ll call my “safety limiter.” It’s just an instance of the Ozone Maximizer at the very end of the chain, set to IRC III Balanced mode. Its job is to get the song up to my preferred mastering level and prevent any digital overs. Right now it’s doing 3–4 dB of limiting at times, but, as we’ll see, we can use the vintage modules to soak up most of those transients elsewhere.
And here it is with the Vintage EQ added in:
Vintage Compressor
If the Vintage EQ is an idealized model of two real-life units, the Vintage Compressor is what you might call a fantasy compressor. It takes elements from various real-life hardware compressors, beloved by engineers the world over, and blends them all into one extremely versatile module. Among these characteristics are:
Feedback compression
This is notoriously difficult to implement in digital.
A variable release time
This is dependent on the amount of compression happening, which can help to reduce pumping, especially under heavy compression.
A highly versatile sidechain filter
A versatile sidechain filter is also useful to reduce pumping or help target compression to specific frequencies.
Three compression modes
These modes allow you to enhance transients, the body of the signal, or a blend down the middle.
Here I’ve added it to the output of the Vintage EQ module and it’s doing that mixbus glue thing we all love on a good rock mix, adding density and perceived loudness while actually reducing measured level and load on the final safety limiter.
Vintage Tape
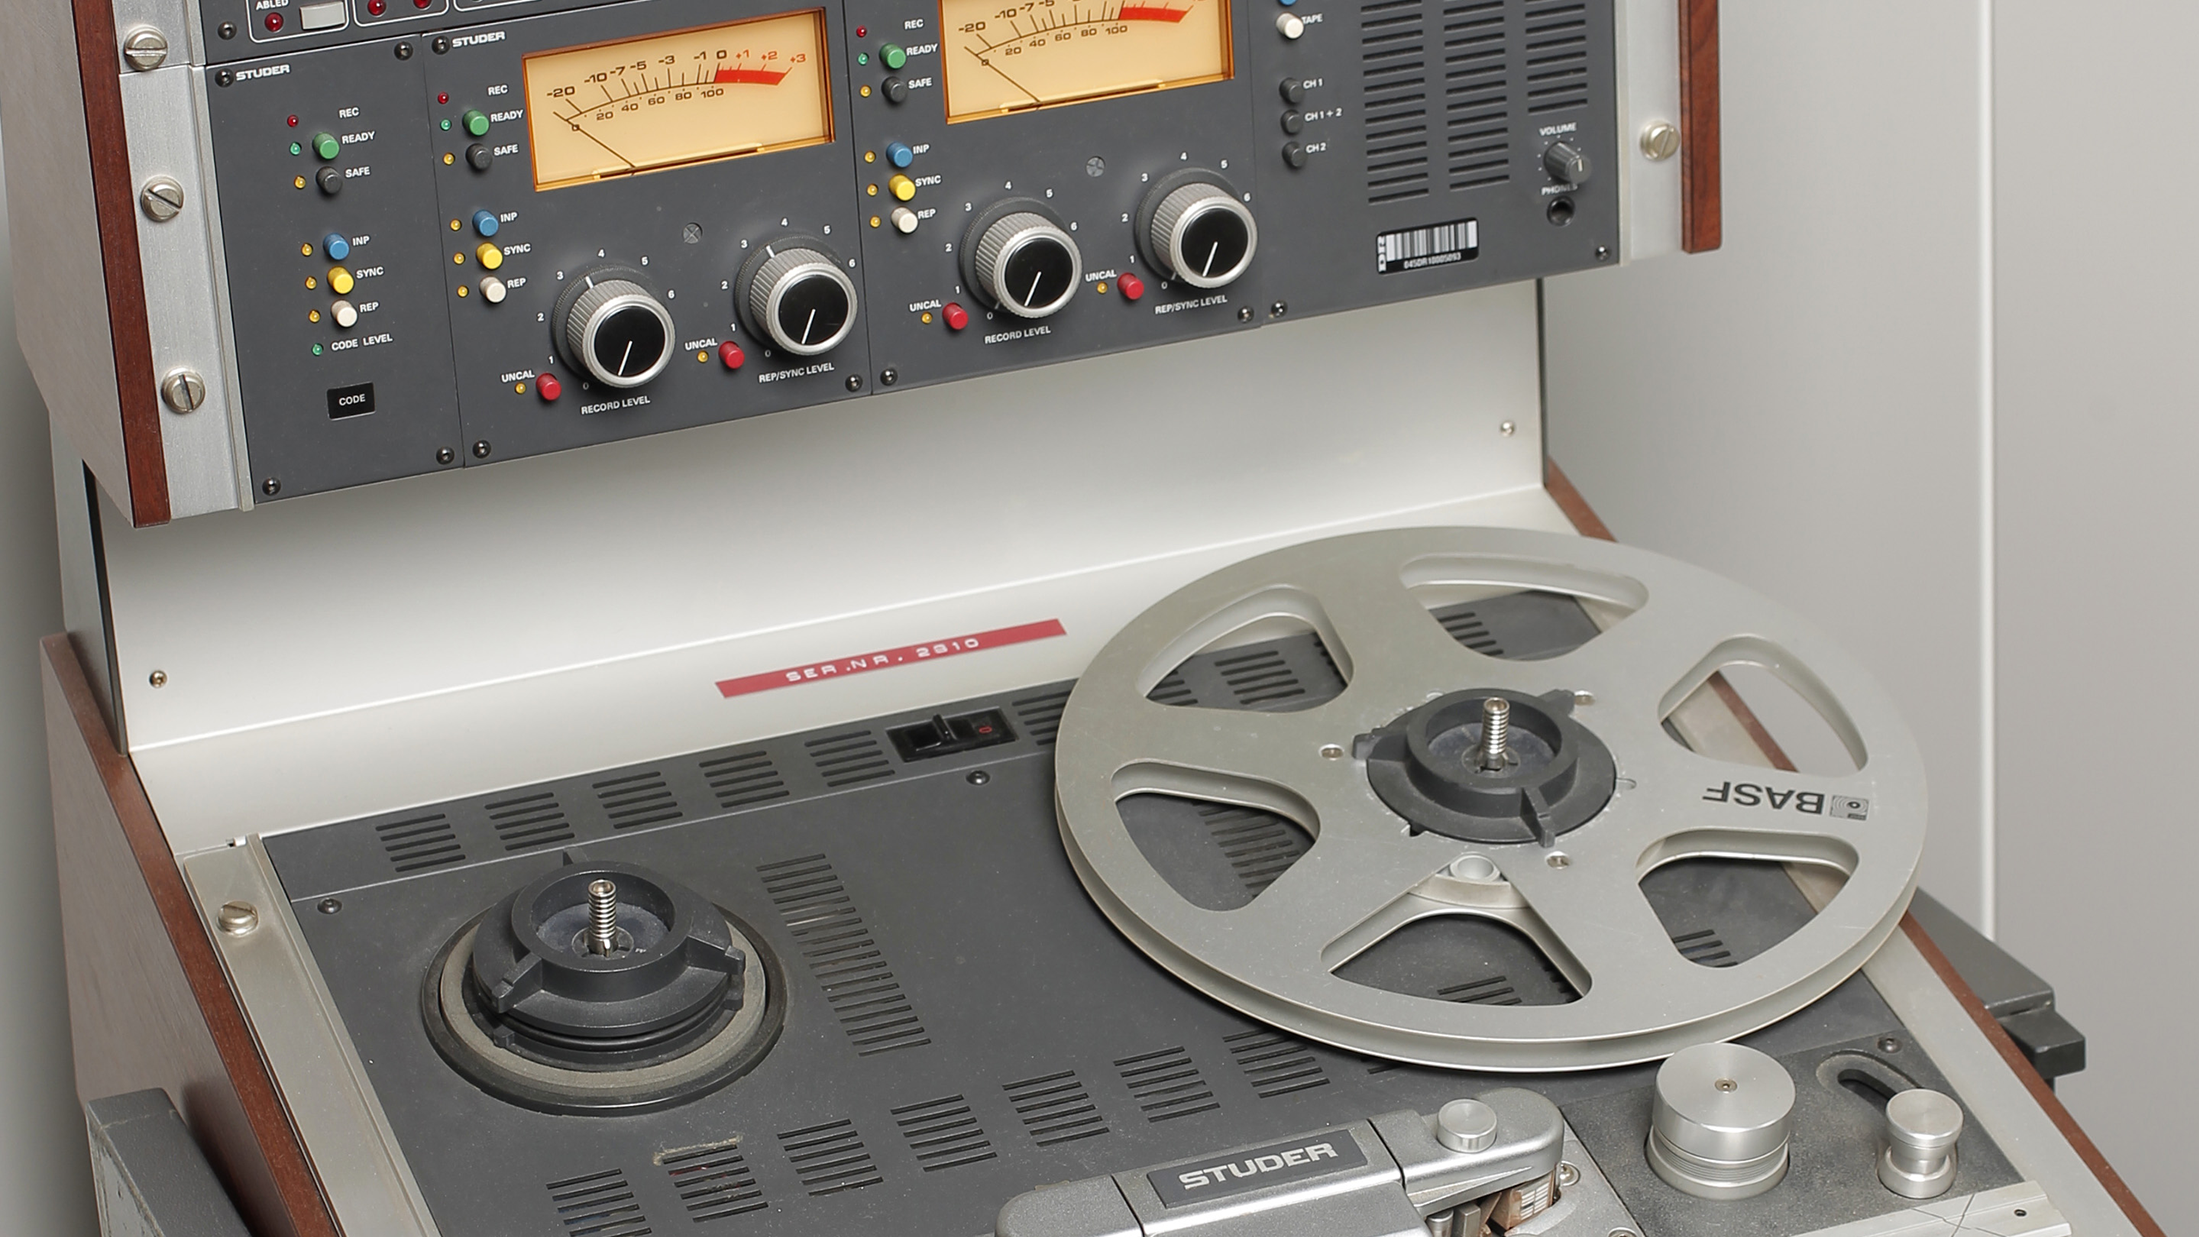
For the Vintage Tape module we dip our toes halfway back into the idealized world. Tape is great, unless you don’t want crosstalk, hiss, wow, flutter, calibration, maintenance, time spent rewinding… should I go on? The Vintage Tape module is inspired by a meticulously-maintained Studer A810 and allows you to get some of those classic tape non-linearities—tape compression, saturation, and phase rotation—and tonal enhancements without the headache of actually owning a tape machine.

A Studer A810 2-track tape machine
Listen to it below, added to the rest of our vintage chain. I’ve chosen the following settings:
30 IPS
This helps maintain an open top end, but also cleans up the very low end, while simultaneously enhancing the thump of the kick.
4dB of input drive
This helps push the tape compression and saturation to where they’re adding a bit of grit, soaking up some of the transient information in a very pleasing way, and, again, easing the load on the safety limiter.
Bias of -0.5
This shifts some of the distortion toward the higher frequencies, and helps give the midrange (where all the good stuff lives) a nice little push.
Harmonics set to 2.0
This contributes a density to the sound, without going over the top.
Low emphasis 0.5, high emphasis 2.5
The low emphasis—dialed back from the default of 2—reins in the low frequency bump to a level I’m liking, while the high emphasis—dialed back from the default of 4—tames energy above about 5 kHz. These two, in conjunction with the bias, help give the song a nice, mid-range-forward sound.
And in case you were wondering, below are the frequency, harmonic, and dynamic characteristics of this particular setting (note the scales on the axes). Not the most subtle thing in the world, but boy does it work for this mix.

Vintage Tape frequency response

Vintage Tape harmonic analysis

Vintage Tape transfer function
Vintage Limiter
Finally we come to the Vintage Limiter. An homage to the classic Fairchild 670, it includes many of the cherished characteristics of the legendary feedback tube compressor/limiter, without emulating it exactly. With a soft knee, program and mode-dependent attack and release times, and subtle tube-style harmonics, it offers a thick, vibey take on limiting that provides an excellent contrast to the transparency of the Maximizer module.
By adding it to the end of our vintage chain, but before our safety limiter, we can enhance the punchiness of the drums while also shaving off a bit more level. This leaves only the last 0.5 dB of limiting to the Maximizer (compared to the 4.5 dB it was doing before the vintage chain was engaged).
Conclusion
If you’ve never tried them, Vintage Modules in Ozone can add a wonderful range of sonic colors to your mastering palette. From clean yet classic broad strokes EQ and supremely flexible feedback compression to the harmonic enhancement of tape and tube limiting, they can often offer just the right touch to a song needing a vintage or analog feel.
So next time you need a little extra grit, glue, or vibe, don’t forget about these modules, and if you’re not sure where to start, remember the Vintage mode in Master Assistant is there to help you out.