10 Home Recording Studio Hacks to Improve Listening
Improving the listening environment can have a huge impact on your ability to create balanced, consistent mixes. Today, we discuss 10 tips for doing just that in a home recording studio.
When talking about the most important tools for music production and mixing, we’re likely to think of DAWs, plug-ins, speakers, and MIDI controllers. With these tools, most producers and mix engineers feel like they have everything necessary to get to work.
However, we rarely consider that our home recording studio itself is an important tool in the musical process as well. Many people will be listening to the music we make through speaker systems of some sort, so being able to hear our work resonating in a space is important.
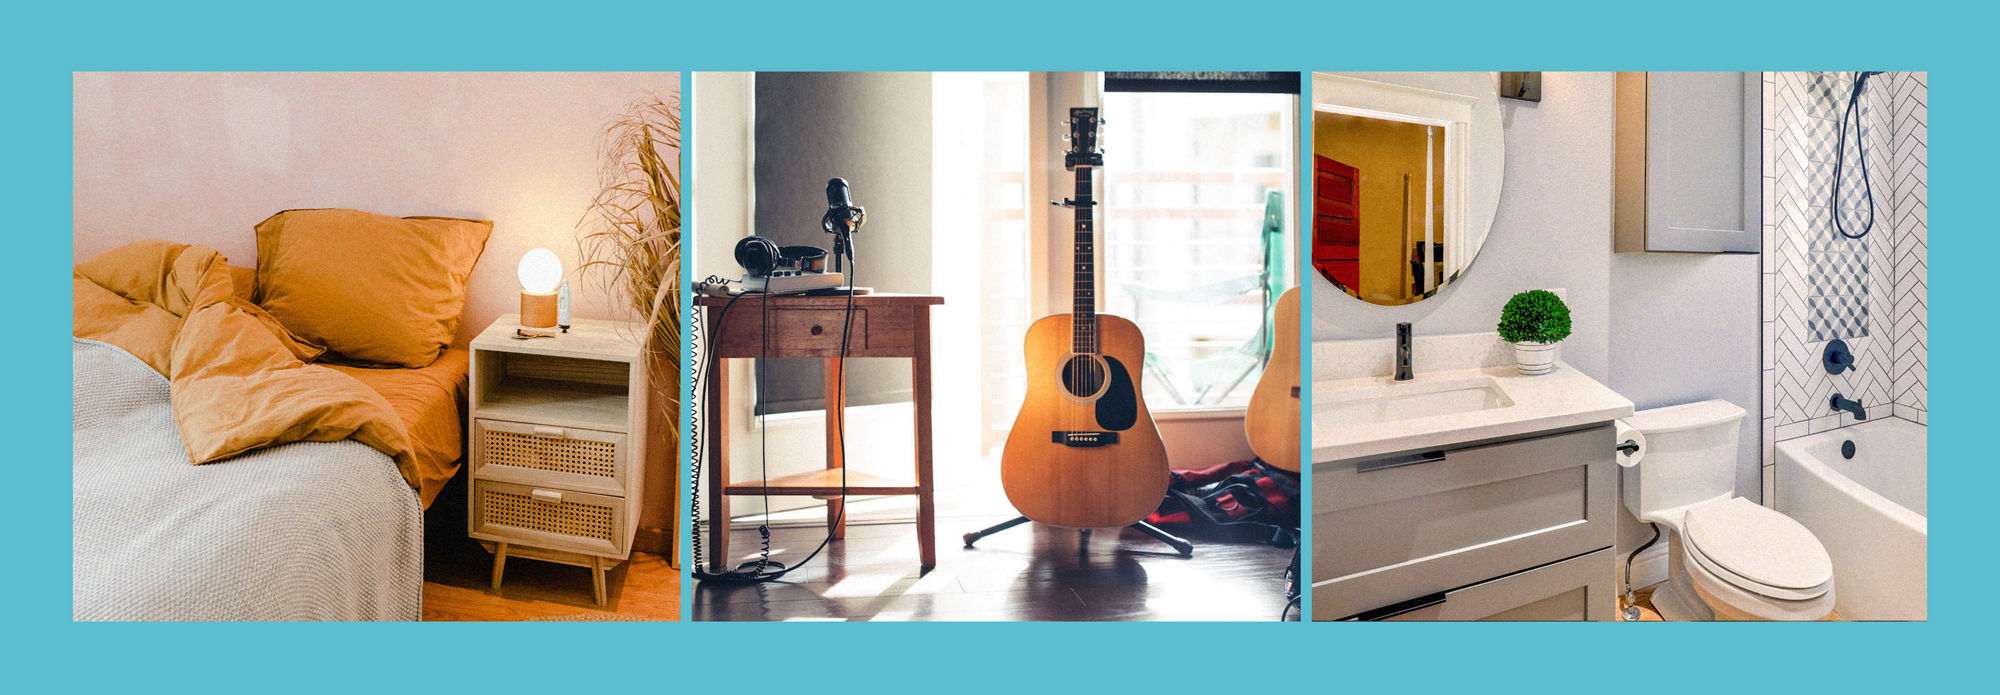
While listening to music in a comfy bedroom may be enjoyable, the accuracy of our listening environment is extremely important. We may become used to the acoustics of our regular workspace, acoustics which do not necessarily exist in the spaces in which people will listen to our music.
In this article, we’ll cover 10 hacks to improve your home recording studio environment. If you notice that you can make any of these changes in your studio, give these a try and see how positively they affect your mixing and production.
1. Optimize your listening position in the room
The first and most obvious tip to improving your listening environment is making sure you’re listening from the correct place in that environment. Sound waves will be propagating throughout your studio, bouncing off of walls and other surfaces in the room. If you’re not listening from the optimal position, the acoustics of your room can have a drastic impact on the accuracy of the listening experience.
Before anything else, it’s assumed that your room is more or less rectangular. This makes it easier to anticipate how sound waves will travel and reflect off of surfaces in the room. These tips can still help if your room is not rectangular, but this is definitely the ideal room shape.
In most cases, the optimal orientation for your setup is facing one of the shorter walls in the room. The listening position should be centered, equidistant from the right and left walls. Exact distances vary depending on who you ask, but generally speaking your chair should be positioned about one third the room’s length away from the front wall.

Ideal listening position
2. Optimize your studio monitor placement
We briefly covered monitor positioning in a previous article centered around studio monitors. Check out “Types of Studio Monitors and Which to Choose for Home Studios” for more information on monitors in particular.
The listening experience is greatly affected by the location of your studio monitors. While obviously having an impact on stereo imaging, this placement is also important in making sure you receive direct sound (directly from the speaker to your ears) in the correct way.
The most important factor of speaker placement is their relationship to each other and the listening position. Monitors should be as far from each other as they each are from the listening position. These three points should create an equilateral triangle, with each monitor facing directly toward your head.

Proper monitor placement
Monitors should also be placed approximately at ear-height. This can be done either with foam isolation underneath the monitors or with adjustable speaker stands. We’ll get to the importance of stands in a second.
Make sure that monitors are not placed too close to the corners of the room. These corners are the most problematic points of the room, giving sound waves two or sometimes three surfaces off of which to reflect. This can produce an inaccurate bass response for the room, causing low frequencies to be unbalanced.
For more considerations involving room acoustics and monitor placement (specifically in a mastering mindset, but applicable to all home studio environments), check out this video.
3. Minimize desk vibrations
While your first thought may be to worry about sound reflecting off walls, it’s important to remember that all surfaces in the room can reflect or absorb sound. This includes the desk you’re working at, which should be treated as importantly as any surface in the room.
A common mistake many people make in home recording studios is to simply place speakers directly on the desk itself. Even if the equilateral triangle setup is present and speakers are at ear-level, vibrations from the speakers can travel through the desk and create artificial resonances that don’t exist in the mix itself.
There are generally two ways to address this problem. First, isolation pads, like these from Auralex Acoustics, can be placed underneath monitors to absorb these vibrations. Pads are generally inexpensive, but even simple pieces of styrofoam can even be used in a pinch.

Auralex MoPad isolation pads
However, these pads do not guarantee that zero vibrations will reach the desk. A sure-fire way to prevent vibrations is to position monitors on stands which sit next to the desk. Any vibrations will travel through the stands and into the floor, rather than resonating in the desk. As mentioned before, stands have the added benefit of perfecting monitor height, as most are adjustable.

On-Stage SM6000-P monitor stands
4. Be conscientious about surface materials
It can be easy to look at room acoustics in a purely geometrical way, but it’s also important to consider the materials present in the room. Certain materials are more reflective than others, which may be able to absorb more sound. Additionally, certain materials may reflect more sound in certain frequency ranges, leading to artificial imbalances in the room’s frequency response.
One of the main culprits for creating artificial reflections is glass. Ideally, there should be as few windows as possible in a monitoring room, as these will cause a good deal of reflection. Obviously, if you’re working in a home studio, it may not be possible to cut down on the number of windows in the room. However, it’s advisable to cover these windows if possible.
Fabric materials, on the other hand, will help to absorb sound waves. Carpets, blankets, mattresses, and the like can act as DIY sound absorption. To solve the window problem above, drapes can be used to cover windows and provide a level of sound absorption.
Low frequencies are especially difficult to deal with, as they can pass through thin absorptive materials. Furniture like couches and chairs, being fabric but also dense, can help to absorb these frequencies and prevent bass buildup in the room.
5. Be wary of standing waves
One of the main problems that a room will create is the generation of standing waves.
Sound waves will have a particular wavelength depending on their frequency. This is the distance in space that one cycle of the wave will inhabit. For example, a sound wave at 100 Hz has a wavelength of about 11.3 feet.
If the 100 Hz sound wave hits a surface 11.3 feet away, it will reflect back and line up with the original wave. This will create constructive interference, and the 100 Hz wave will increase in amplitude.
It’s important to understand what frequencies become standing waves in your listening environment. If a standing wave at 100 Hz is present, it will appear that 100 Hz is too loud in your mix, and you may choose to attenuate it. In this scenario, you would have compensated for an acoustic quality that isn’t present in other rooms, and 100 Hz will then be too quiet in your final mix.
Regardless of room size and shape, standing waves are inevitable. Certain frequencies will line up perfectly with the room dimensions and create standing waves. Because of their longer wavelengths, lower frequencies (usually under ~300 Hz) are typically the most likely to become standing waves.
Because standard sound treatment panels are better at dealing with higher frequencies, there isn’t a whole lot that you can do to eliminate these standing waves. Instead, it’s better to reduce the impact they have on you by adjusting your listening position.
The three main standing waves you’ll want to keep an eye on are those in the three main axis of your room: between front and back walls, between left and right walls, and between ceiling and floor. These are called axial modes. Ideally, these resonances should be spaced across the bottom three octaves, as opposed to them all being concentrated in one part of the frequency spectrum.
The frequencies that will become standing waves in your room can be found using this formula, with x being the length of a dimension of the room. Remember that harmonics will be created at multiples of these frequencies, which can also become standing waves:
Standing Wave Frequency = 1130 / 2x
With the frequencies of your main standing waves in mind, walk around the room to find where these frequencies are most pronounced. You should not have your listening position at any of these locations, as you will be hearing an inaccurate representation of the room’s frequency response here.
Standing waves are most noticeable near boundaries of the room, which is why the recommended listening position from Tip #1 is ideal. If you notice that this listening position is in one of the room’s standing waves, try moving your chair closer to or further from the monitors themselves. Remember to adjust the position of the monitors afterwards to keep your equilateral triangle setup.
6. Install acoustic treatment
Now that your listening position and monitor placement are correct, desk vibrations are eliminated, and you have a good idea of how your room naturally sounds, we can begin to introduce some acoustic treatment into the room.
There are three main varieties of objects available to acoustically treat a room: absorption panels, diffusers, and bass traps. Keep in mind that it’s unnecessary to completely cover the surfaces in the room, and that 30-40% coverage should do nicely.
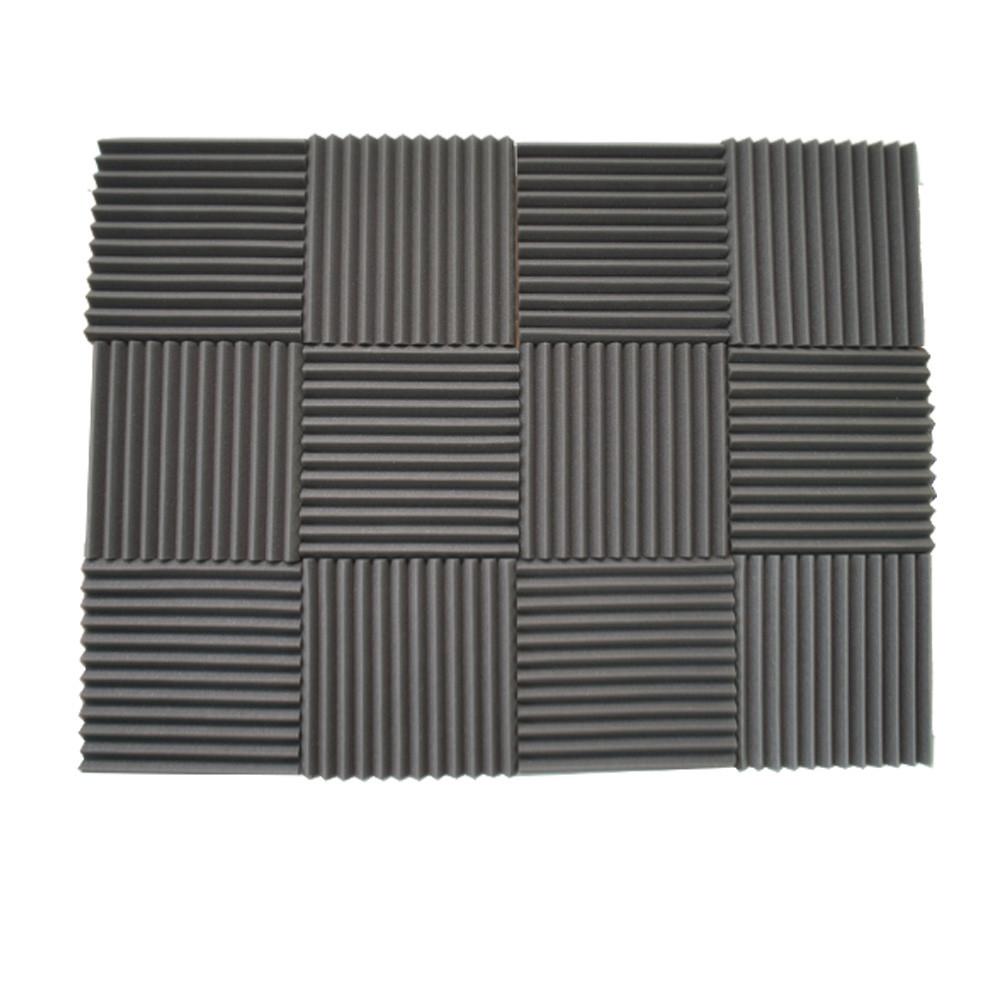
Absorption panels are generally used to absorb mid and high frequencies in the room. They can be made of a variety of materials, from rockwool to fiberglass. They work by converting sound waves (kinetic energy) into heat as the absorptive material vibrates.

Foamily absorption panels
You’ll want to use absorption panels to control early reflections, sound waves that bounce off of only one or two surfaces before hitting your ears. These are the most problematic reflections in your room, as they can interfere with direct sound and create artificial resonances in the listening experience.
The main locations that you can install absorption panels are along the back wall and the side walls. Using a mirror and an assistant, you can easily find the exact locations where first reflections will occur.
While sitting in the listening position, have your assistant move along the walls with the mirror. Keeping your head in the same position and turning your neck to face the mirror, take note of the points that you see a monitor in the mirror. These points are locations of early reflections, and should be covered with panels.
Keep in mind that the same mirror trick can be used to find early reflections on your desk itself. These early reflections are especially troublesome, as they’ll be closest to your ears and most likely to interfere with direct signal from the speakers. Absorptive materials can be added to the desk surface to help alleviate this issue.
If you don’t have the budget for absorption panels, absorptive materials can be a decent substitute. As mentioned, objects made of fabric, like drapes and curtains, can provide sound absorption. Nonetheless, dedicated panels will be your best bet.
Diffusers are similar to absorption panels, but work with a different philosophy. A completely absorptive room can sound a bit “dead”, as it’s important to hear the reverberation of sound in the room. Being made of solid materials like wood and being shaped unevenly, diffusers are designed to evenly scatter sound waves (usually mid and high frequencies) throughout the room rather than absorbing them.

Skyline diffuser
By scattering sound waves using diffusers, we’re able to minimize reflections while preserving the natural sound of your mix in the room.
The back wall is also a good location to place diffusers. When deciding where to put absorptive panels and diffusers, try following the “Live End, Dead End” concept, which states that one end of the room should be covered with absorptive materials and the other should be covered with reflective surfaces like diffusers.
A good rule of thumb is to make the front wall (behind the desk) your dead end and the rear wall your live end. Place absorptive materials on the dead end and diffusers on the live end.
Note: It’s possible to create a studio that almost exclusively uses diffusion, like Blackbird Studio C designed by George Massenburg.
If you don’t have the budget for diffusers, any solid, irregularly shaped object can act as a diffuser. Bookshelves and other hard surfaces in the room will provide some diffusion, scattering sound waves as a diffuser would. Again, however, dedicated diffusers are ideal.
Although absorption panels and diffusers should handle mid and high frequencies well, they won’t offer much help in controlling lower frequencies. These low frequencies can quickly build in an untreated room, giving the room an unbalanced bass response and decay. This is where we can incorporate bass traps.
Bass traps are dedicated absorptive panels, typically composed of a denser absorptive foam, specifically designed to absorb low frequencies. Because they are essentially heavy-duty absorption panels, bass traps alone can sometime handle all of your absorption needs.

eFoam bass trap (corner)
Bass traps should generally be placed along the back wall. Due to the longer wavelength of lower frequencies, it’s best to allow enough distance for low frequencies to propagate before deadening them. Traps should also be placed in locations where walls, the floor, and/or the ceiling meet, as corners can cause the buildup of bass frequencies.
If you don’t have the budget for bass traps, large and dense absorptive objects can help. A couch or mattress will generally have enough density to control these low frequencies.
7. Don’t forget about your floor and ceiling
It’s easy to simply think about the walls in your room reflecting sound, but your floor and ceiling will do so as well. As such, they should simply be treated as two more walls in the room.
Floors can be carpeted to absorb sound waves. It’s best not to have a fully carpeted room to avoid over-absorbing sound, and rather have a medium-sized rug underneath the listening position.
The ceiling can be treated above the monitors and your listening position. A great option is an absorptive panel called a ceiling cloud, which can either be completely attached to the ceiling or suspended using a frame.

Primacoustic Stratus ceiling cloud
If possible, you can cover the entire ceiling with bass-absorbing panels (at least 12 inches thick) to completely prevent the ceiling from affecting room acoustics.
8. Use room correction software / hardware
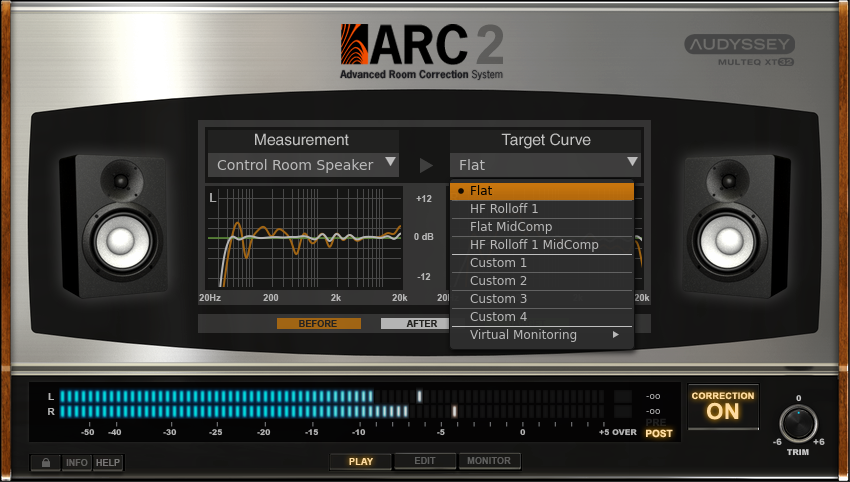
In addition to acoustic treatment, it can also be a good idea to incorporate a room correction system in your home studio. While acoustic treatment addresses audio problems after sound has left the monitors, room correction software and hardware will affect sound before it leaves the monitors to compensate for room acoustics.
While there can be differences between different room correction systems, all generally work through three steps.
First, the frequency response of the room (the level of certain frequencies at different locations in the room) is measured. This is done by playing test tones into the room, which are recorded with a microphone.
The room correction software or hardware will then analyze these measurements to find frequency issues in the listening environment.
Finally, the system creates a filter that attenuates and/or boosts certain frequencies. This filter is applied to the final playback audio coming from your DAW to create a frequency response in the room that is closer to the “real” sound of your mix.
You may be thinking “Great! I can just get some room correction software or hardware and not have to worry about acoustic treatment.”
Unfortunately, this isn’t the case. Room correction systems only handle frequency issues, most notably in low frequencies which are most affected by room acoustics. Time domain issues, in which parts of the signal reach the ear at different times (e.g. reverberation in the room) cannot be solved with room correction.
Only acoustic treatment and the room design can help to solve problems like this, and as such should be used in conjunction with room correction to achieve the ideal acoustic character of the listening environment.
Here are a few examples of room correction systems that you can consider adding to your studio:

IK Multimedia ARC 2.0
Trinnov Optimizer (this can even solve time domain problems!)

Trinnov Optimizer

JBL MSC1
9. Upgrade your equipment
The above tips should help make the most of what you have available or what is relatively affordable to buy, but an upgrade in equipment can always help to improve the listening environment. It should be no surprise that a studio with state-of-the-art equipment will generally sound more accurate than a DIY bedroom studio.
Obviously, upgrading electronic equipment will allow for a more accurate listening experience. Investing in a set of new monitors, new cables, or even a new audio interface can certainly be worth the price in the long run.
Higher quality sound treatment can also enhance your listening environment. Acoustic absorption panels and proper diffusers will be specifically designed to do that job, and will generally be an improvement on hanging blankets (absorbers) and bookshelves (diffusers).
Don’t worry if you don’t have the budget to purchase better sound treatment, as there are numerous resources online that can show you how to build your own. All it takes is a bit of elbow grease and you can avoid breaking the bank on treatment.
10. Hire a professional
Lastly, if all else fails, and if you have the budget, it can be beneficial to seek professional advice. Bringing in an acoustician to analyze and diagnose your room is a sure-fire way to have the correct acoustic setup for your space. They will be able to take exact room measurements and design the ideal combination of absorption and diffusion to create a balanced room.
Conclusion
Improving your listening environment can be a real game-changer for your mixing and production. These changes can be as simple as moving a in the room or as involved as fully acoustically treating your room.
In either case, taming acoustic inconsistencies will allow the sound you hear in the room to more accurately represent the true tone of your mix. This allows you to make more informed mixing decisions, to create mixes that translate across many sound systems, and ultimately to bring your work to a higher professional standard.

