5 Common Vocal Mixing Issues Nectar 3 Solves
Vocal mixing is one of the main tasks new engineers struggle with. Resolve five common problems with Nectar 3.
Mixing vocals is one of the main tasks new engineers struggle with. On top of the abstract (feel and emotion) and technical (level and frequency content) variables to consider for each performance, we also need to think about genre conventions and the current musical context.
While every performance has its own quirks, there are certain issues that almost always crop up in mixing sessions, like masking of the vocal with other instruments. For this reason we designed Nectar 3, the latest version of our vocal mixing suite, with assistive audio features to solve common problems by using your creative input. Let’s look at five scenarios:
Issue 1: endless trial and error
If you’re reading this, my guess is you read a few other mixing tips blogs too. One thing you might notice is that most shy away from listing off cardinal rules that apply to all vocal mixes. Which is with good reason—all vocals are different! Other blogs might try to convince you there is one single trick to make your recordings sound like the pros.
We align more closely with the former camp, not only through the content we put out, but also in the plug-ins, we design. Since there are so many factors to consider in vocal mixing, we created the Vocal Assistant feature to give you a starting point preset based on the unique qualities of a performance.
In a matter of seconds, it analyzes your vocal to detect inconsistencies and areas of improvement, and then offers up a custom effects chain of EQ, compression, reverb, and more. The parameters of the individual modules can be tweaked to get a vocal sound that fits just right.
I’ve spent many hours mixing and wondering whether the decisions I’ve made are any good. With the starting point provided by Nectar 3, you can maneuver through this experience with much more ease, teaching yourself what a professional vocal sounds like by retracing the steps provided by the Vocal Assistant. A/B the compression and listen to how it alters the vocal. Do the same with the EQs, then rearrange the signal chain order. After doing this many times over, you’ll be able to pinpoint exactly what a vocal needs to shine and know the tools to get it there.
Vocal Assistant in Nectar Pro
Vocal Assistant now can do even more in


Nectar Pro
- Use the new Intensity slider to control the strength of Vocal Assistant's processing.
- Set the Tone of your audio for specific vocal sounds with new “Tone Cards,” giving you nearly unlimited combinations of different vocal sounds to play with.
- Vocal Assistant can now operate in real-time, and remembers your audio—no need to re-run the assistant to find the sound you want.
- New audio detection for setting the right effects for sung, rapped, and spoken vocals.
- Improved processing and EQ decisions to match your creative input.
Learn more here.
Issue 2: fixing muddy vocals without thinning them
The first step most mixers take when sculpting vocals is to remove unimportant low-end information. Depending on a recordings’ sound quality, this can be as simple as setting a cutoff point around 100 Hz and moving on to the next thing.
When vocals are recorded in bedrooms with iffy microphones and a swaying vocalist, you have to get more surgical to remove the mud without altering the tone. This is further complicated when the vocalist has a deep voice buried in the rumble. If the EQ cutoff crosses over the first few harmonics, you will hear the desired clarity but lose the important heft that carries a tune. So you often up either settling on something that sounds just OK or sacrificing precious vocal energy. No fun!
A simple solution lies with the Follow EQ in Nectar 3, which rides selected vocal frequencies throughout a performance to preserve intelligibility and character. With a low-pass filter set just below the fundamental, the curve will subtly adjust its position word-by-word but also make larger leaps during sections where the vocal either significantly rises or drops in pitch, like the transition from verse to chorus. This way, the unwanted noise below is consistently controlled without the need for automation or severe cuts. Be sure to hit “Freq” on a node to active Follow EQ to do this.
Issue 3: taming resonances with precision
The Follow EQ is equally useful for taming pinging frequencies that exist higher up in the spectrum. In a standard EQ, we’d dial in a cut wherever a band of frequencies is poking through the mix. Vocal performances, being dynamic in nature, don’t always respond well to these static decisions. A 1 dB cut might handle a harsh vocal in the verse, but you will certainly need something stronger in the chorus. If there are many resonant peaks to tame, you may be tempted to use a broad EQ cut to snag those in close proximity, ultimately scooping out more frequencies than necessary.
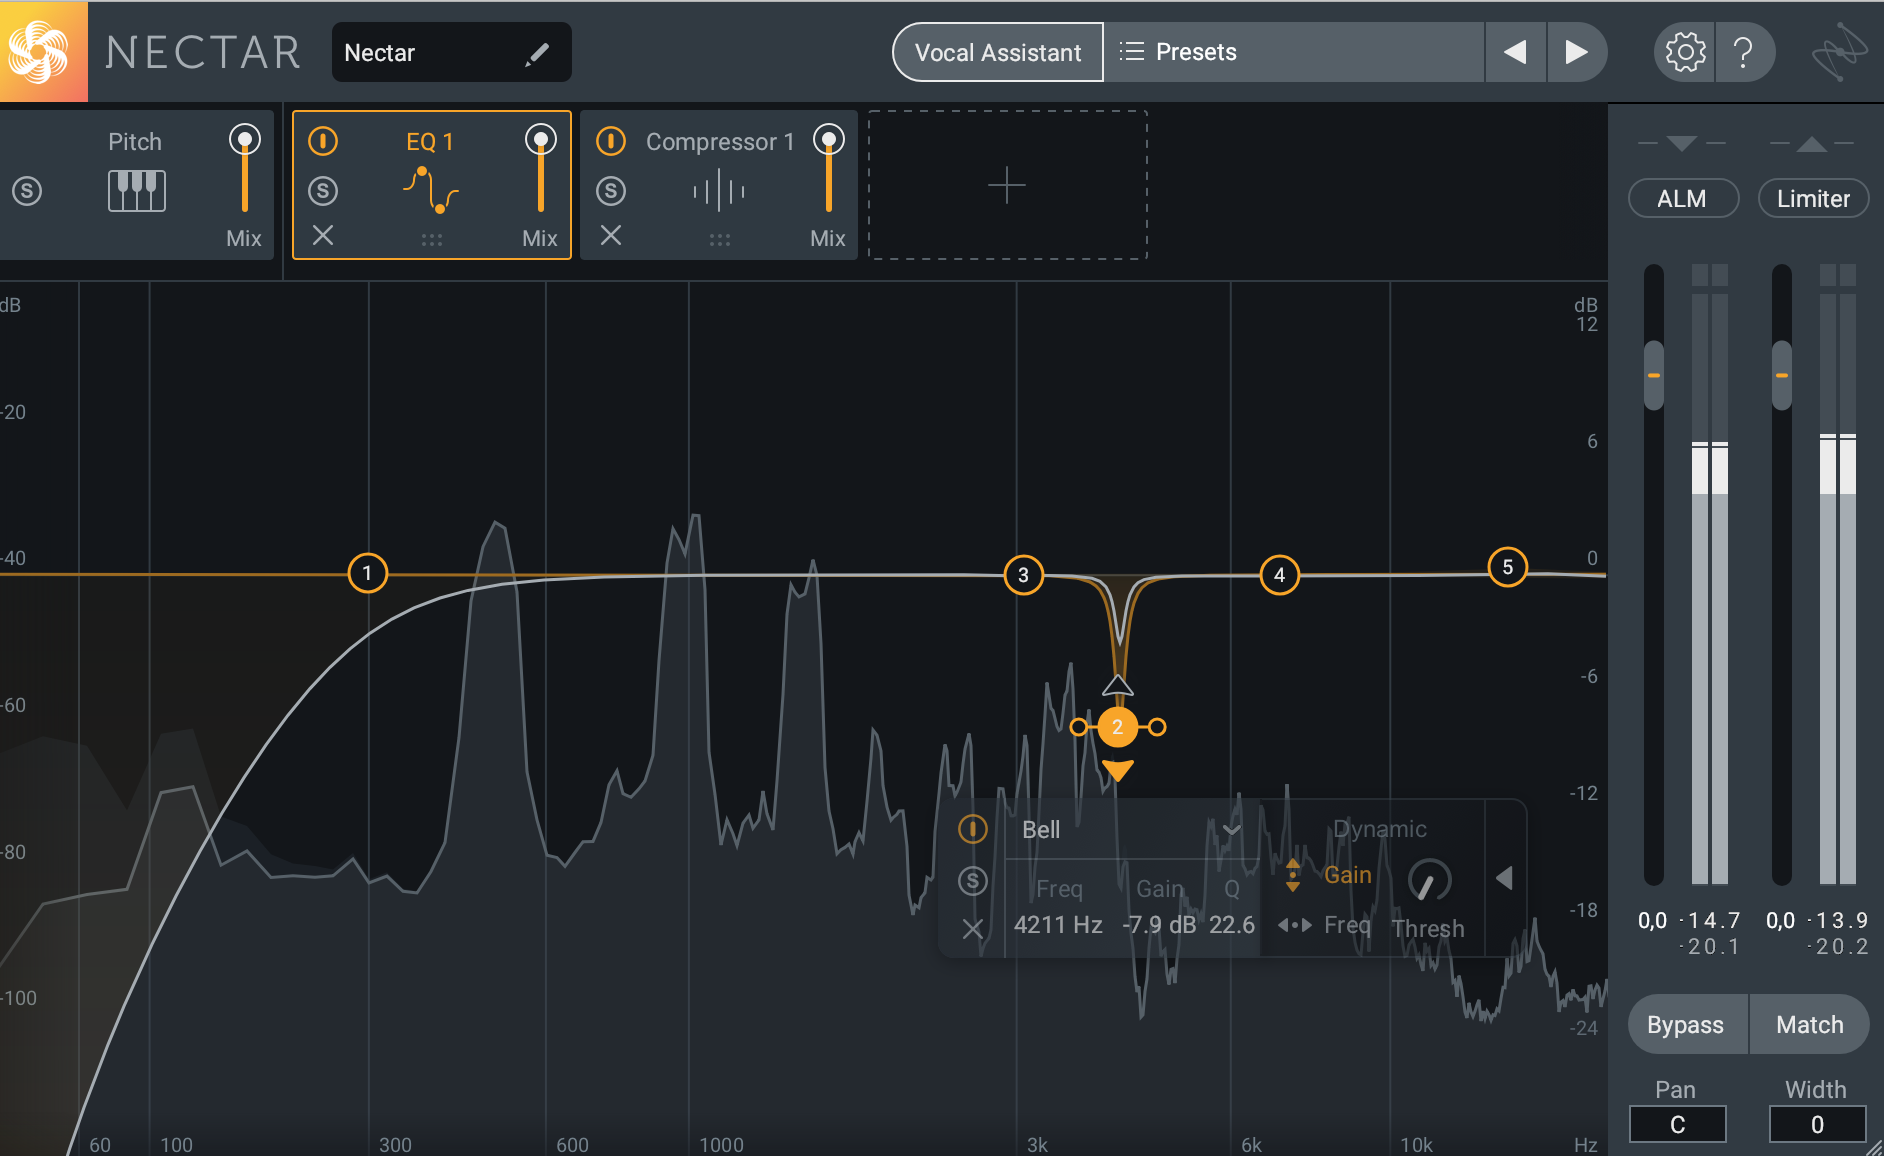
Vocals are sensitive signals and require mixing that reflects this. With the Follow EQ engaged (this time in “Gain” mode), you can dial in a precise cut that ducks problematic frequencies only when they are present, so important parts of the vocal aren’t removed without reason. Pulling the Threshold dial down gives you even more control; with high settings, whenever the selected frequencies are active there will be more gain reduction and when the signal relaxes so will the reduction.
This is particularly helpful on irksome sibilant words or syllables that manage to evade the de-esser. We typically target the 10–12 kHz region for these harsh sounds, but you also get some nasty esses around 5 kHz. If you pulled the threshold down this low, however, you’d chop off essential chunks of the vocal and introduce strange artifacts. But with this setup, you can tame the sibilance with total precision.
Removing sibilant frequencies with Follow EQ
Issue 4: unmasking vocals from similar-sounding tracks
A hallmark feature of commercial music is a vocal performance that consistently maintains the central focus. This is particularly noticeable in modern pop and hip-hop mixes—from section to section, no matter what is brought in or out of the mix, the lead has a clearly defined space.
In part, this is achieved by reducing masking between the vocal and other instruments. For new and veteran engineers alike, this is one of the more common issues encountered. Like separating a vocal fundamental from the rumble below, its can be a challenge to strike a balance between messy (lots of masking) and too thin (excessive cuts).
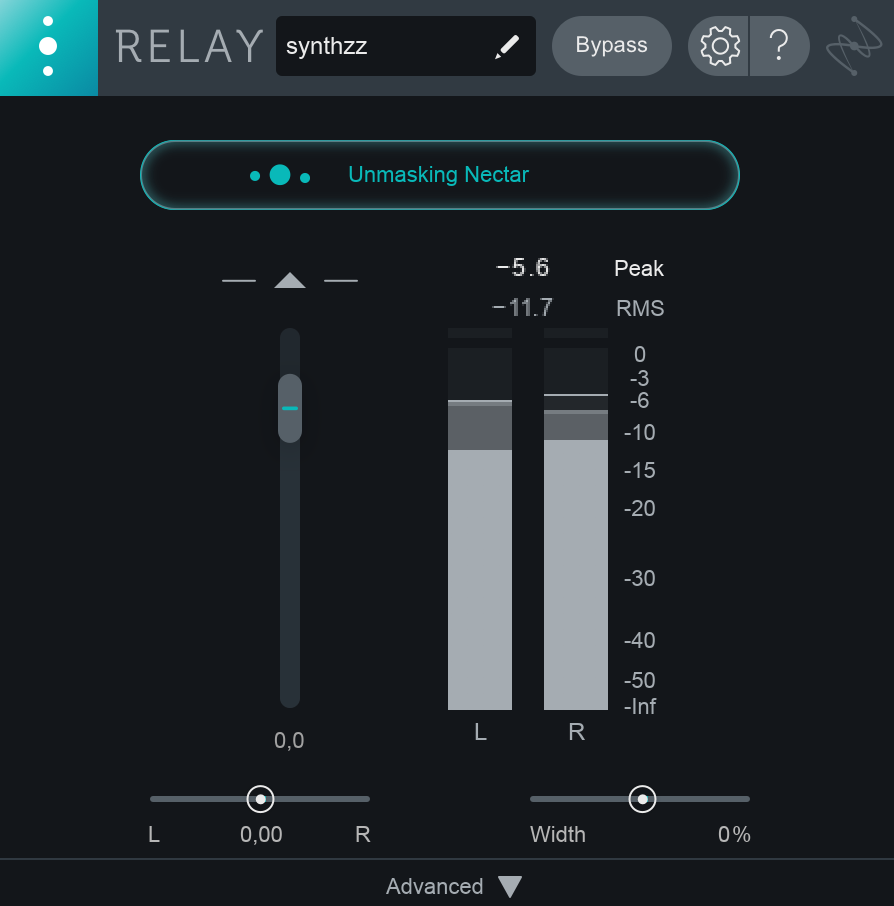
With Nectar 3 on your vocal track and an instance of Relay on a track or group of tracks you think are causing masking issues, run the Unmask Assistant. It will detect masking frequencies on the track(s) Relay is positioned on, then apply an EQ curve to suppress them.
Relay in Unmask Mode
This technique is also useful for when you need to mix a separate vocal and stereo track without the stems. Nectar and Relay will apply an EQ setting that creates a pocket for the vocal to be heard without compromising the tonal balance of the instrumental.
Issue 5: generating harmonies after the vocalist has left the studio
Say a band with a limited budget recorded a single but ended up rushing through the harmonies since they only had a few hours of studio time and the takes aren’t too great. Or maybe you were recording them and in the excitement and exhaustion of it all, never asked about harmonies and they didn’t bring it up.
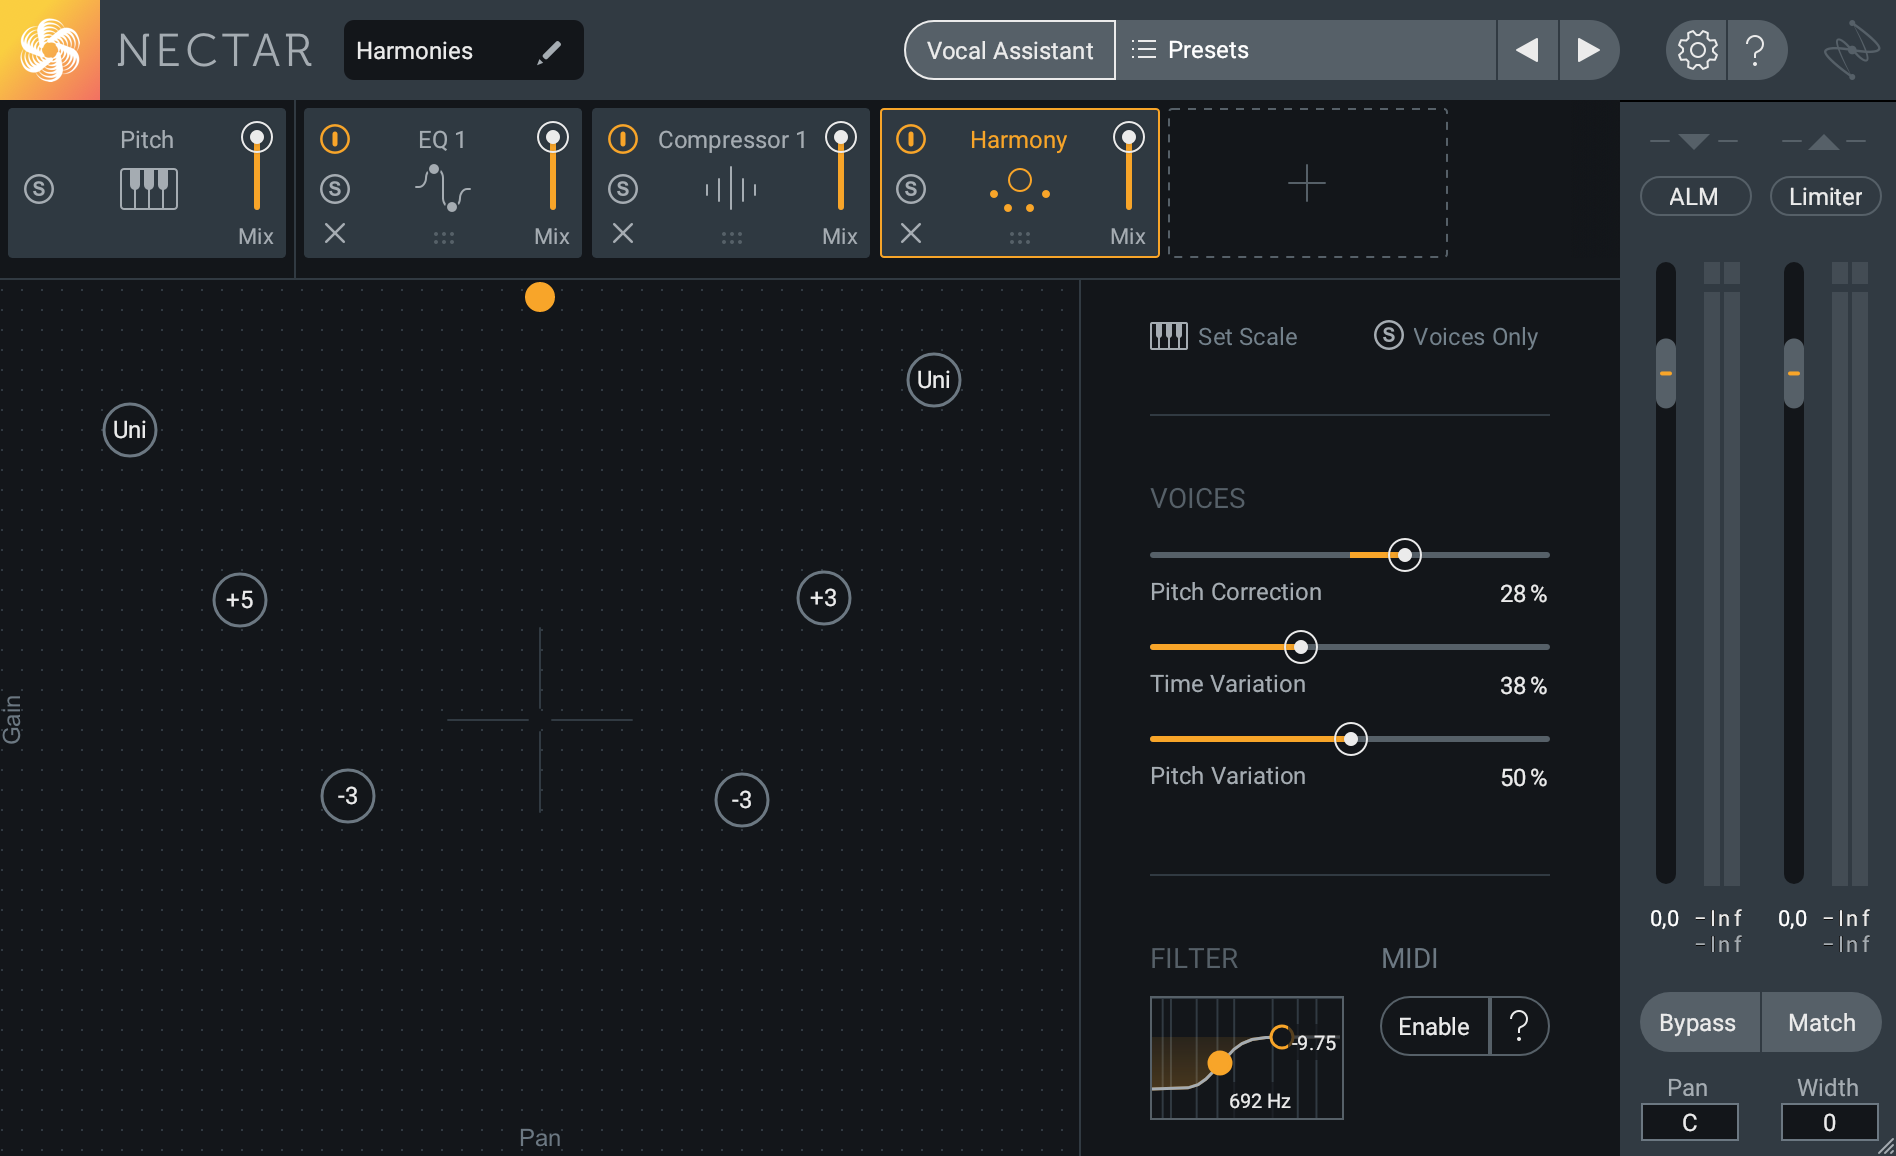
No matter the reason—if you need to harmonize a vocal and don’t have any suitable takes, Nectar 3’s Harmony module allows you to generate up to eight additional voices snapped to scale or controlled by MIDI. Using the pitch and timing variation sliders, you can get that loose feel of a natural harmonies. You can also control their placement in the stereo field.
Nectar 3 harmonies
The Harmony module isn’t just for crisis control though. You can generate harmonies way outside of a normal human vocal range, create the impression of a choir from a single take, or fit the general cyborg-like aesthetics of modern vocals with pitchy doubles and triples. Much of the pop, rap, and R&B vocals we hear today has a digital and noticeably artificial quality, so don’t be shy here.
The takeaways
The issues mentioned in this article are ones I run into often, and I hope the solutions provided help improve your workflow. Much of the technology in Nectar 3 has not been around for long, so for someone who has done the heavy-lifting themselves for years it can feel like a secret shortcut. For the newbies, it's a great way to quickly become familiar with the many facets of vocal mixing in an intuitive and helpful environment.
