11 Mixing Tips for Panning Music with Intention
Learn about the intentions behind panning decisions. You’ll find practical tips to intentional panning, starting on an instrument-by-instrument level and expanding into more complex concepts.
We have articles that cover what panning is and the logistics of panning instruments when mixing. But intention is everything, especially when it comes to panning techniques.
So in this post, we will cover the reasons behind certain panning decisions. We’ll go into why you would or wouldn’t choose to pan something. Below you’ll find practical tips to intentional panning, starting on an instrument-by-instrument level and expanding into headier concepts.
Try out these panning techniques with a free demo of


Neutron 5


Visual Mixer
1. Pan overheads for a centered snare
If your intention is to have drums with a clearly defined snare—one that sits in the center of the mix—that decision often starts not with the snare mic, but with the overheads.
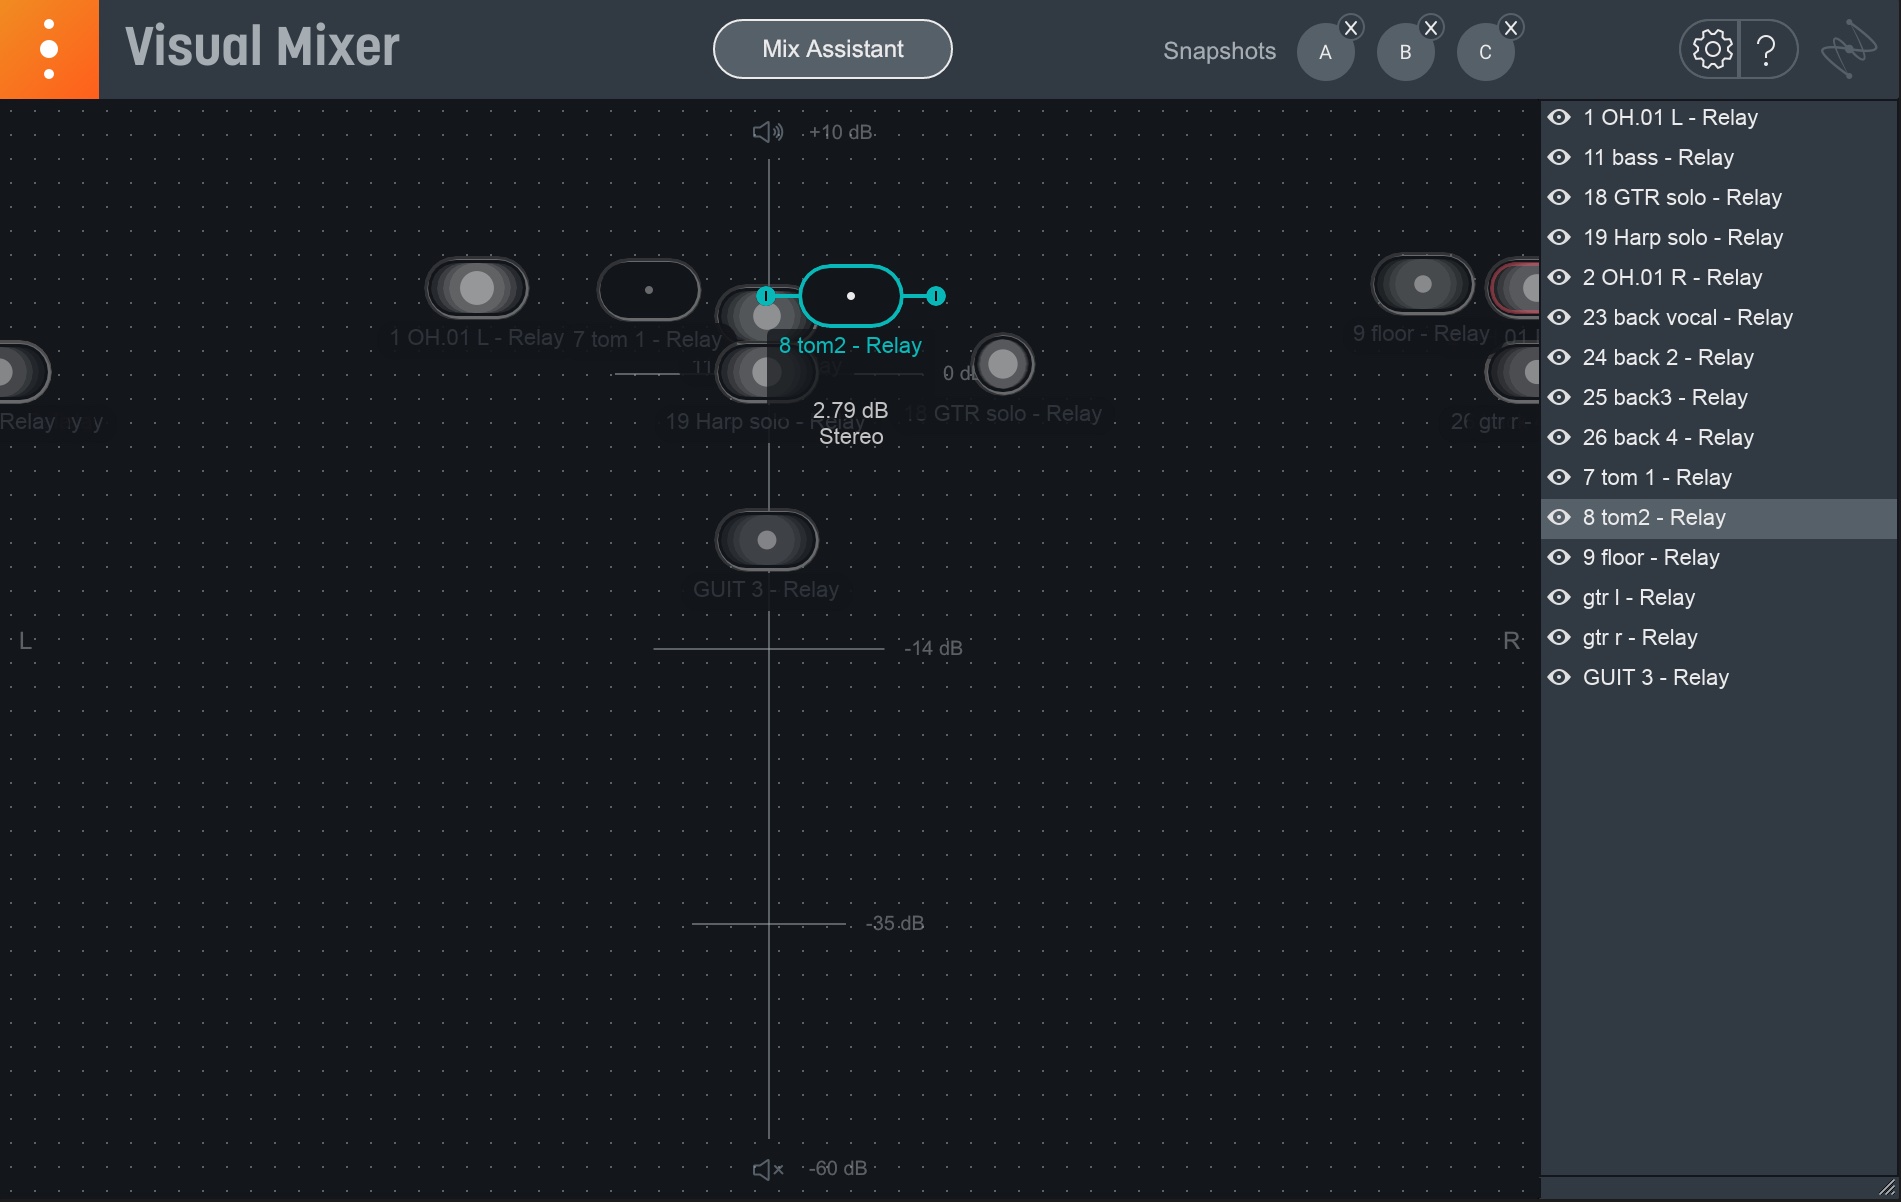
Bring them up in solo—it’s okay, I won’t tell anyone—and pan them left and right at equal volume. Listen in headphones for a second: does the snare lean toward the left of the picture? If so, bring the left overhead channel closer to center by degrees until the snare is located in the middle. How’s your kick doing now? Is it off to the side a smidge? You can compensate with minimal panning of the right channel, or you can leave it: the kick drum mic will draw more focus to the center than the close-snare mic, whose fundamental frequencies compete more with what the overheads are likely to capture.
Here’s an example of how the process would work using the Visual Mixer in Neutron 4.
You’ll note how I auditioned different settings with the kick and the snare in. Hard left and hard right, while giving us a wide picture, really messed with the center snare image. Take note of this approach—it really works!
I prefer this audio panning technique to time-aligning plug-ins most of the time, because it feels more organic to my ears. Plug-ins like Auto-Align can do wonders for a picture-perfect image, but you might find they flatten out the sound, or snuff out the energy a bit. Still, you may want to try some manual time-alignment to make sure the snare is in phase between the left and right overheads.
If you don’t want a centered snare, that’s fine (a slightly off-center snare works well in the Tool song “Ænema,” for example) but all the positioning recommendations above still apply, and that’s because of this next tip:
2. Pan the close mic drums to match the overheads
You might be at a loss for how to pan drums. Sure, it’s hard at first—especially with all the stereo and phase considerations.
Here’s a tip to get you started: If your intention is to create naturalistic, acoustic drums, make sure your close mics match the aural positioning of your overheads. You may want the widest tom sounds possible, but it is quite difficult to negate the inclinations of the overheads and not sound immediately different from them.
This can be your intent, sure, but intention is everything: the snap and ambiance of close-mic’d drums are frequently found in stereo overheads, so tread carefully, lest you induce disorienting phasing mixups.
Again, check out this video for how I’d go about the process with Neutron 4.
3. For hard rock guitars, try hard panning
This is a basic technique, but it bears repeating. If you have two hard rock guitars doubling each other, the quickest way to that classic hard-rock sound is to pan them all the way left and all the way right. That’s the convention most of the time, and if your intention is to fit or play within this convention, that’s your move.
Examples of this technique in practice include “Sweat Leaf” by Black Sabbath, “Back in Black” by AC/DC, “Master of Puppets” by Metallica, “Undone - The Sweater Song” by Weezer, “Spoonman” by Soundgarden, and many, many more.
And, another example of hard panned guitars can be found here, in the following video example.
4. Try to get rid of fake stereo keyboards
Many times a software keyboard comes my way as a stereo track and, after listening to it, the first thing I do is trash one of the sides. Why? Because the mix has so many other things going on—some of them mic’d in stereo—that instruments made wide with delays and modulations only muddy up the image.
Sometimes panning music with intention involves knowing when to collapse a stereo source to mono, so you don’t obfuscate the general picture.
Indeed, good directionality in mixing comes not from stereo elements, I’d wager, but from excellent positioning of mono sounds across the stereo spectrum. That’s how you achieve a mix that’s cleanly defined, and easily beheld by the listener.
5. Don’t always go wide with background vocals
If you’re wondering how to pan vocals—particularly background vocals—the answer is simple: there’s no wrong way to do it. However, intention is everything. Check out this example, for instance:
Left to my own devices, I’ll pan background vocals like this:
That’s a sample from my pet project, a work of audio fiction called Salmon’s Run, and sure, this is a valid technique for stacks of background vocals. But last year I was blown away by the vocal stack of a song from Super City, one of my favorite indie bands. The vocals sounded lush, full, and amazing, but to my head-phonic surprise, they were panned thus:
These vocals are put largely in the center to make room for individual elements on the side. Yet they feel full, stacked as they are in other ways—mostly with EQ and level.
Sometimes, especially for background vocals, the decision not to pan be valid, especially in an already crowded mix.
6. Use auto-panning as a genre indicator
Panning automation mechanisms not only create interesting soundscapes, but also signify genres. A Leslie on a vocal is a good example: slap that on a stack of voices and you’re instantly transported to Blue Jay Way (even if the Beatles didn’t use stereo Leslies on that track).
Auto-panning electronic hi-hats and glitch vocals can automatically evoke classic 90s Electronica or Big Beat (Check out “Kick That Man” by Meat Beat Manifesto, for example). Put some electric guitars in reverse, slow down the panning speed, and you’re in psychedelic territory, as D’Angelo did on Voodoo’s “The Root.” Add some eighties-style synthetic auto-panning, such as the type found at the end of Styx’s “Mr. Roboto,” and you’re speaking the language of eighties prog-pop, the sort of stuff that fits right into the textures of an indie artist like Bon Iver.
Listen to your favorite genres and learn what audio panning moves are typical—or what autopanners are employed—and this will go a long way toward following or breaking convention.
Auto panning can be done in plug-ins like


Stutter Edit 2
7. Try LCR (left, center, right) panning
LCR in LCR panning stands for left, center, right. If you find your mix lacks distinctive width or space, I want you to try the following: with the only exception of acoustic drums, try panning every element in your mix to one of these three places. Got a bass? Put it up the center. Got a piano? Only on the right. Double tracked guitars? We covered that already. Violin? You’re starting to get the idea. This is LCR mixing.
You’d think this exercise would create a rather rigid, regimented stereo picture. But go ahead, try it, and tell me what you notice. I’ll bet you’ll hear a cleaner stereo image, one with less clutter and more vibrancy. Now, you can select which standouts, which quirky instruments in your mix, deserve the interstitial places, the 3 o’clocks and 5 o’clocks. They become soloists in the mix’s ensemble.
If you haven’t tried it, you’ll find this exercise might teach you a lot about how to create space with minimal panning moves, allowing reverb or special instruments to occupy the space between the corners. As someone who routinely mixes both in the box and with analog gear, I can also tell you that an LCR approach to an ITB mix helps me achieve a feeling of width that I don’t otherwise have when staying wholly digital.
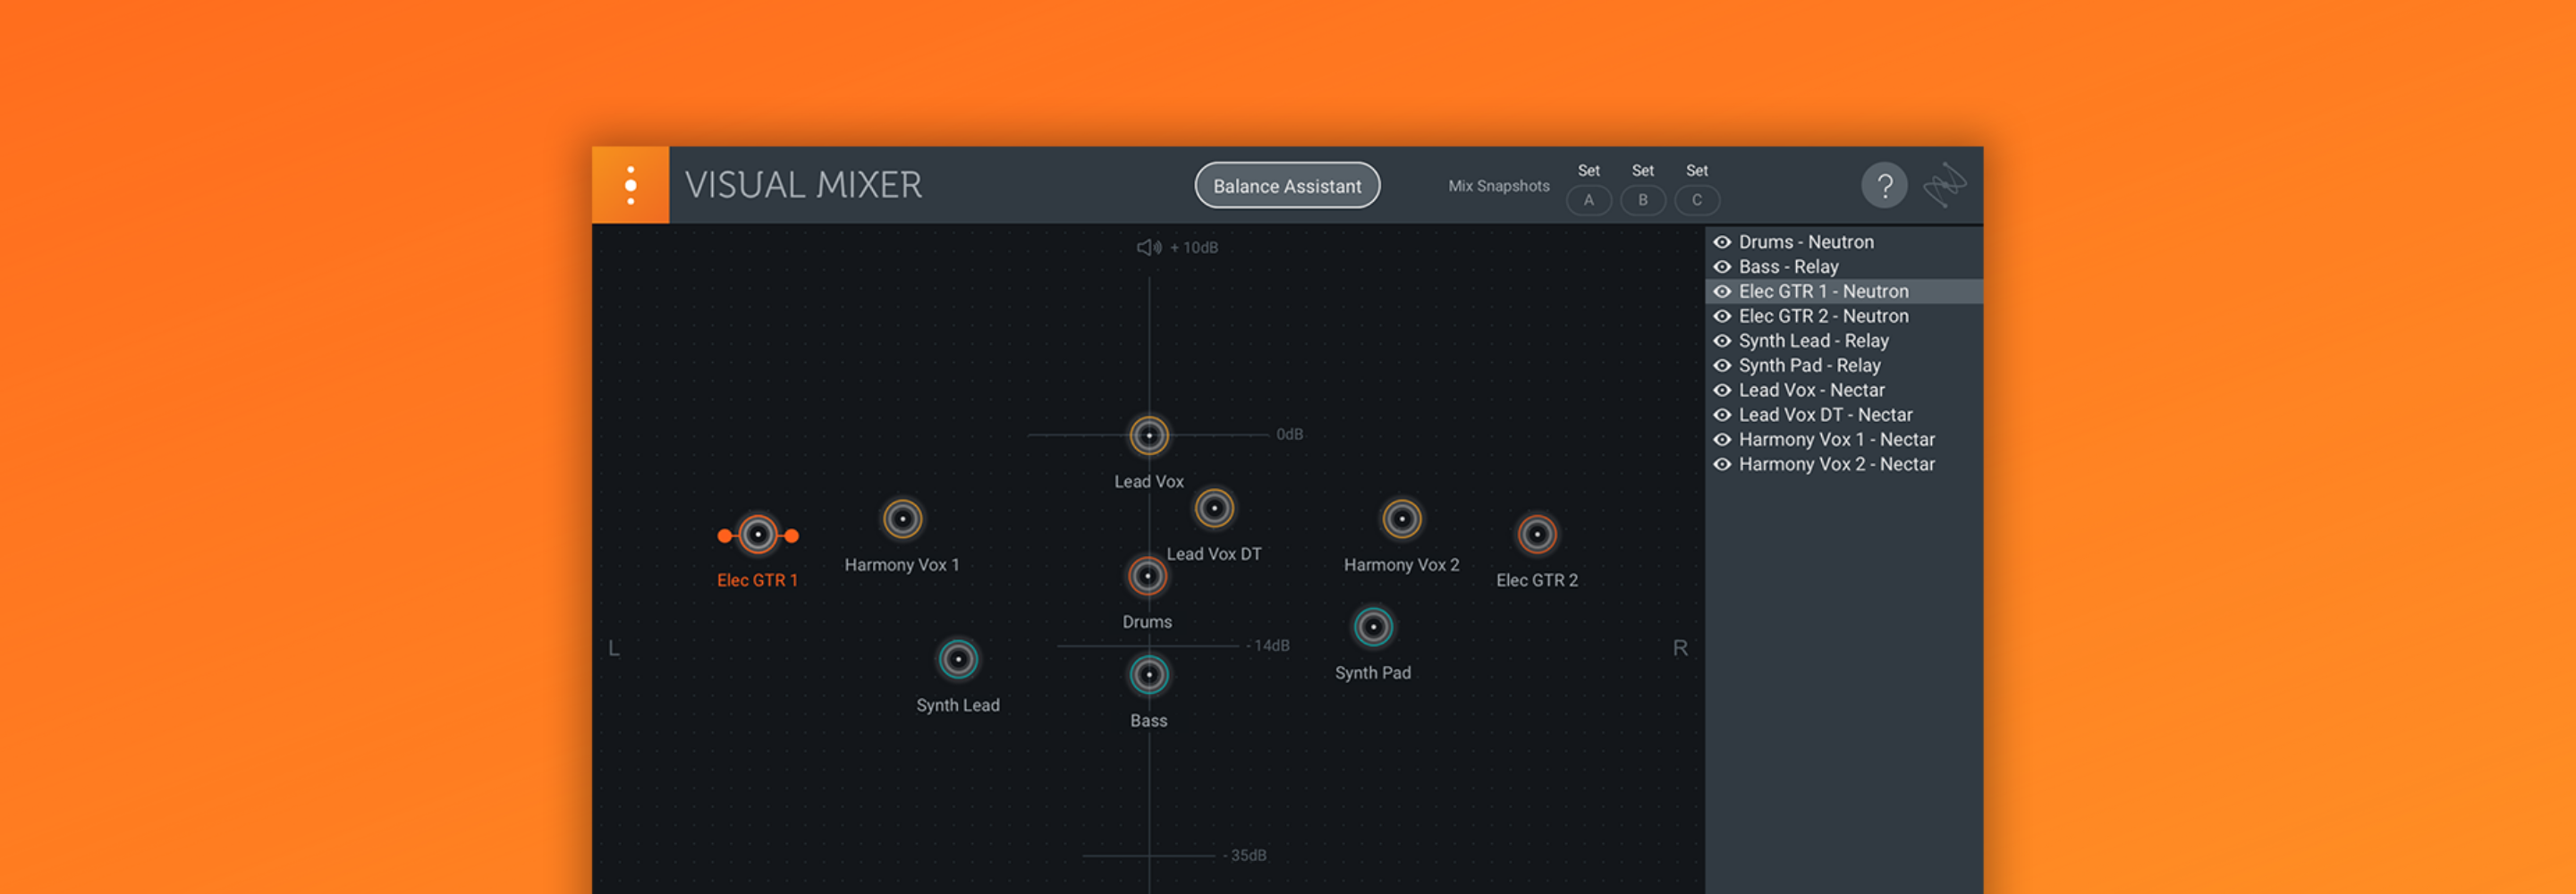
Here’s an example of what a mix might look like with an LCR-like panning scheme. Other than the drums (which are panned naturally to reflect the overheads), there’s only one standout element given an “in-between” spot. That would be the guitar solo.

LCR panning example in Neutron 4 Visual Mixer
8. Play with balanced and unbalanced panning schemes
There is panning for symmetry, where every element feels balanced. A shaker in one location can counterbalance a 16th-note funk guitar part panned in the opposite direction, because the two complement each other. This is a balanced approach.
Asymmetrical panning, on the other hand, leads to a feeling of imbalance—and this feeling can be your friend.
Check out the song “A Distorted Reality Is Now a Necessity To Be Free” by Elliott Smith. Note how the drums exist only in one headphone—yet this is no hastily panned stereo mix from the sixties. This is for a jumbled effect, to denote the sad state of the singer’s song and of his life.
But keep listening and you’ll hear that during the climax, more drums come up in the opposing speaker, playing counter rhythms and Ringo-like fills. As we grow into cacophony, the mixing arrangement goes from unbalanced to balanced, and there is a lesson here:
Going from balanced to unbalanced and back again can create an emotional journey for the listener, so give it a try. This applies not just with similar elements, but complementary one. Contrapuntal rhythms panned in similar directions can lead to a thin feeling, while opposing them lends a balanced width. Play with this balance not just statically, but with automated gestures as well.
9. Close your eyes and visualize
Every time I feel a soundstage getting away from me, I like to stop the playback, shut my eyes, and picture the space I’m creating, down to the color. Is it a ballroom? If so, is it Roseland or Hammerstein? Is it a black, all encompassing void? Well, would that be the void of a dark basement—with all the concrete/cinder block reflections such a basement suggests—or the void of outer space, which is soundless?
The specificity of this exercise allows me to make better decisions, not just with panning, but with other aspects of stereo dimensionality. If I imagine seeing the band at the prudential center, that evokes a much different landscape than watching them play a house party. From there, I can make decisions about how far apart the band members are, how far away they seem, what their EQ is like, and how reverberant elements of the mix might be. Which brings us to our next point:
10. Pan front to back, and behind your head
Don’t let anyone tell you that EQ and reverb can’t create a sense of physical location. They absolutely can: they create another axis of panning—your front to back perspective. The further away an element is, the less high end you’ll hear, as well as level. Depending on the environment, you’d want to filter the lows (far away but still in doors) or boost them (far away but outside). You’ll also hear more late reflections and fewer early reflections.
Don’t forget this vital axis, for then you are truly panning music with intention. That’s how you can put a drummer behind a band, rather than alongside it.
You can even put elements outside the speakers, or behind your head, with polarity inverting techniques. A simple one involves creating an auxiliary channel, reversing the stereo direction (so that right becomes left and vice versa), and inverting the polarity of the swapped channels. If you have an element you wish to appear “outside” the speakers, you can bus it to this auxiliary channel with a send. At certain levels, it may give you the perception of appearing behind your ears. You can even achieve this just by adding


Ozone Imager V2
Do not be too liberal with this effect however; it can wreak havoc on the phase coherence of your mix, and there are serious implications if your mix is heard in mono.
Here’s an example of what that can sound like:
Note how I had the Sound Field meter up in


Insight 2
11. Automate movement tastefully
Excitement can issue from dragging sounds around the stereo space. This is where mix automation comes into play—not only from left to right, but from front to back, with EQ and the manipulation of early/late reflections. As always, taste is the key: too much uncalled for panning can be disorienting, or could date your mix in unexpected ways.
However, tasteful movement, done with intention, can add dimensionality to a mix. You could move a rhythmic element around the headphones, as in the song “Radiator Sabotage” by Leland Sundries. As the shaker moves around the left sphere of the mix during the sparse third verse, the tune heads towards an exciting drum fill; the decision to move this element around contributes to the build-up.
Another example is Radiohead’s “Identikit,” where the cascading vocals of “broken hearts make it rain” show off panning from the front to back: suddenly an aloof Thom Yorke stands out from the crowd on the third repeat, obliterating the other vocals in a phrase that reinforces the tune’s loneliness). Examples of active panning can be heard all throughout D’Angelo’s Voodoo, from the opening traverses of reverse cymbals in “Playa Playa” to the backwards guitar solo of “The Root.” Indeed, that record is an example when it comes to tasteful automated panning, with too many examples to enumerate.
Start panning music with intention
Doubtlessly we can find more panning scenarios and more possible solutions to all your panning woes. Since we’ve given enough to get you started, we’re going to stop here and dwell again on intention. Intention is the most vital thing in a mix—it dictates your every decision. It’s the why behind your what, how, or when. It applies to all aspects of the mix, and panning is no exception. It is our hope, now, that the tips we’ve provided will get you closer to the mix that you’re intending—one that critics will have no reason to pan.
If you haven't already, make sure to check out iZotope's


Visual Mixer


Neutron 5


